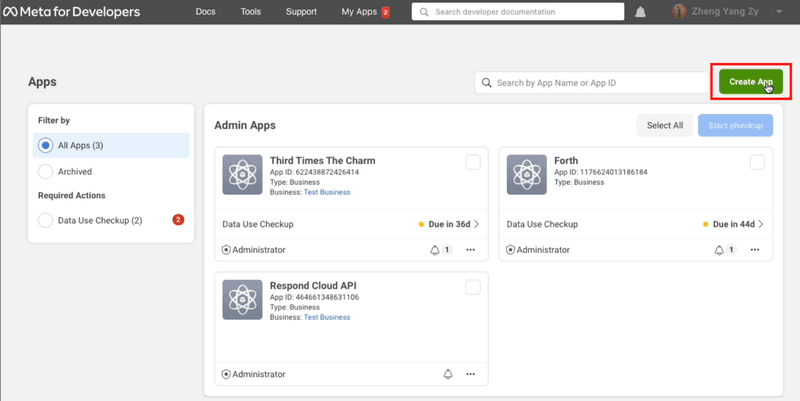
1. Sign up or log in to the Facebook for Developers account and click on Create App.
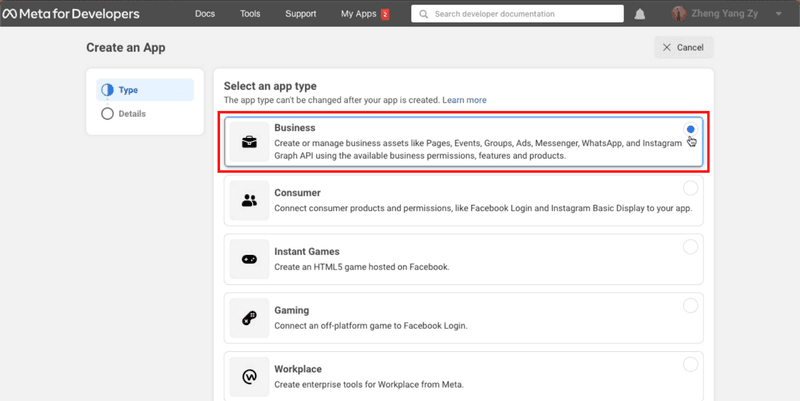
2. Select Business as your app type.
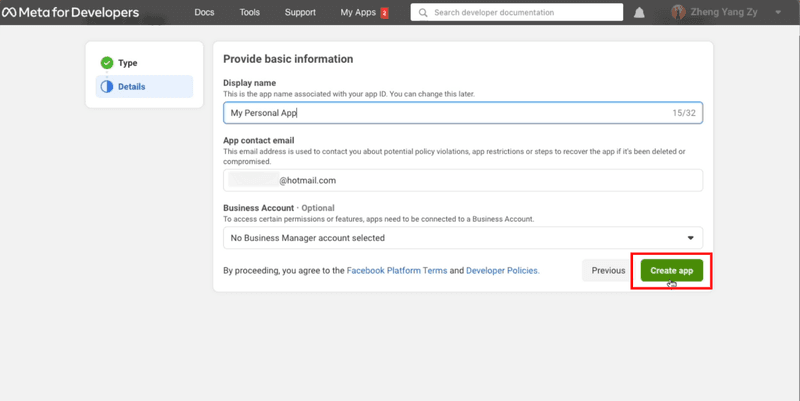
3. Provide basic information about your business. If you don’t have a Business Manager account, you may leave it unselected. Click Create app. You will be directed to your Meta dashboard.
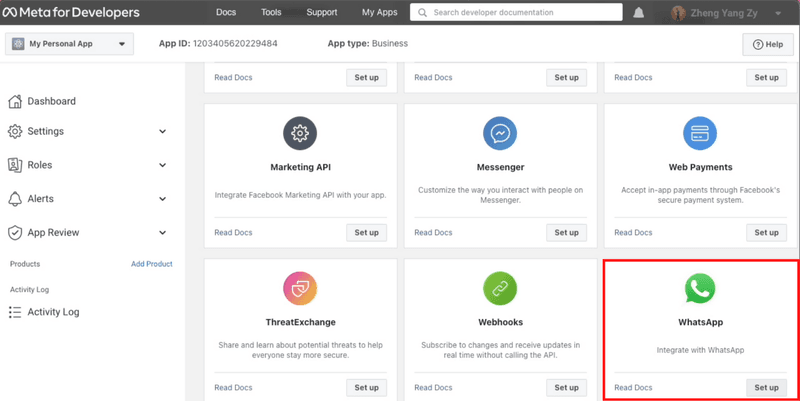
4. Scroll down until you see WhatsApp and click Set up.
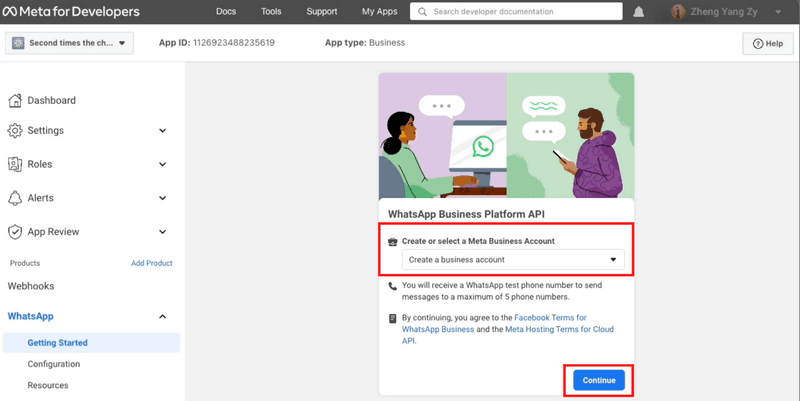
5. Click Continue to accept WhatsApp Cloud API’s terms and conditions. If you left your Business Manager account unselected in step 3, you may leave your Business Account unselected here and Facebook will automatically create a business account later.
6. Send a message with the test number generated by WhatsApp to your personal or business WhatsApp number to test if your integration is a success.
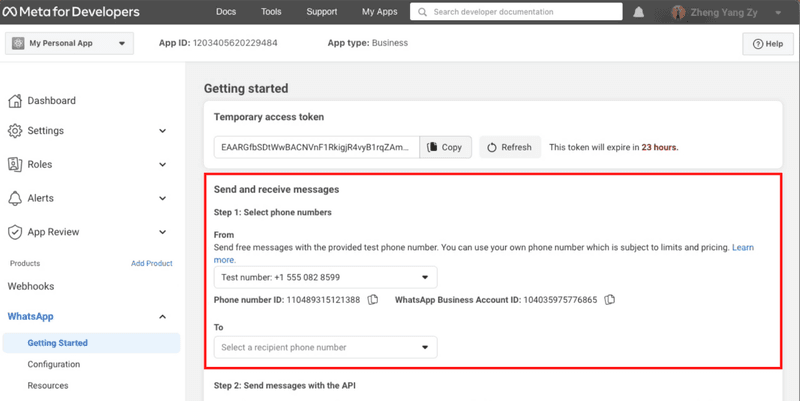
Next, we’ll show you how to add your phone number to your WhatsApp Cloud API account
Connect Your Phone Number
1. Click Add Phone Number to connect a phone number to your WhatsApp Cloud API account.
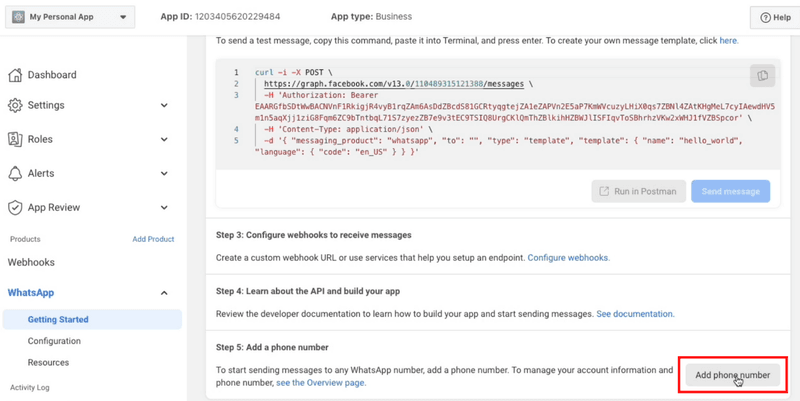
2. Fill in your business information and click Next.
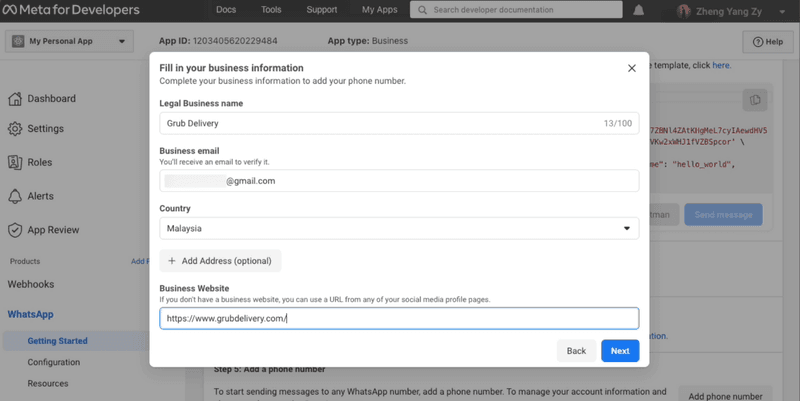
3. Fill in your WhatsApp business profile information and click Next.
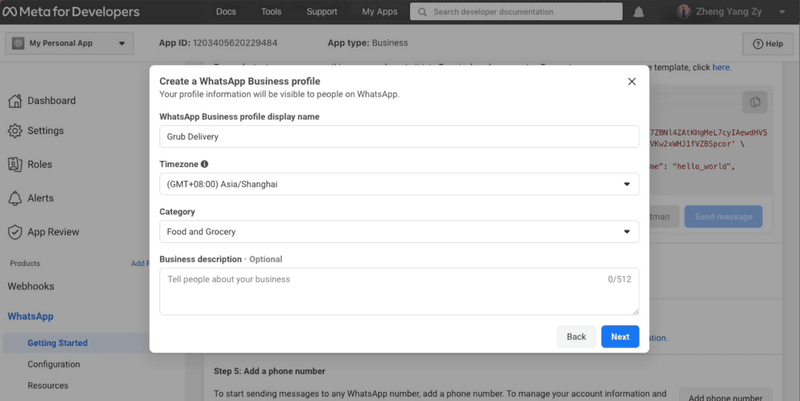
4. Add a phone number for your WhatsApp Cloud API. Note that the number you add cannot be tied to an existing WhatsApp account.
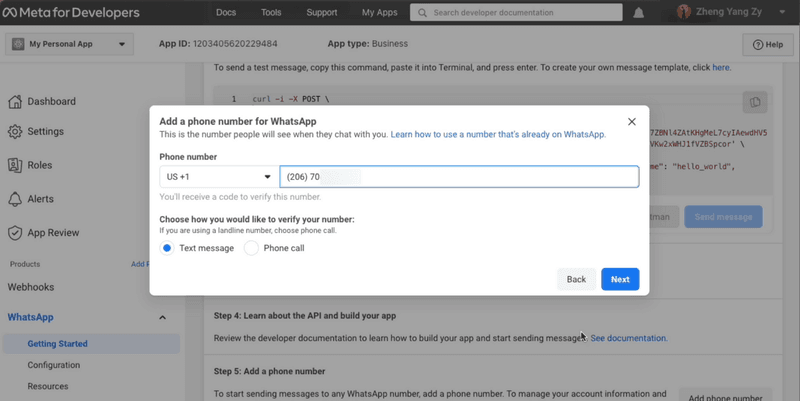
5. Verify the phone number you’ve added. A 6-digit verification code will be sent to the number. Enter the verification code once you receive it.
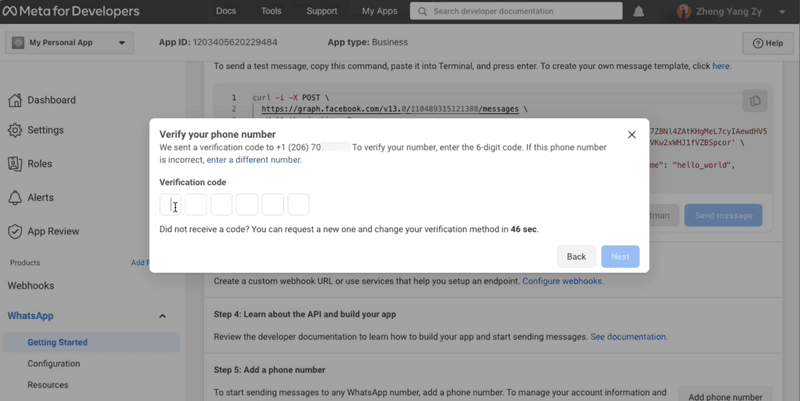
6. Look at the Send and receive messages section. The number you’ve added will be shown.
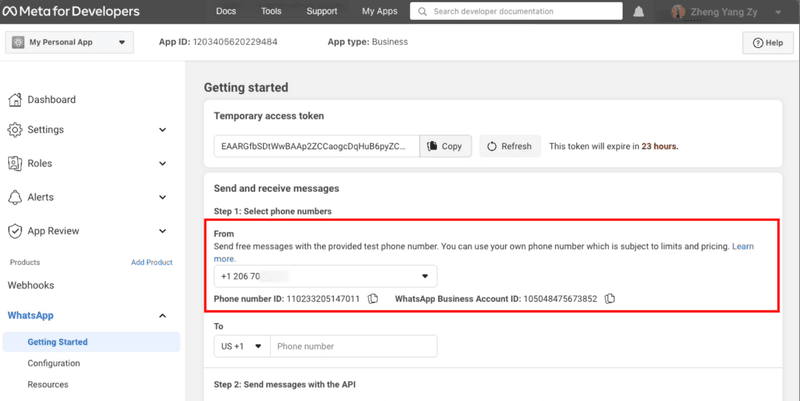
You have connected your phone number with your WhatsApp Cloud API account! Now that you’ve set up WhatsApp Cloud API on your Facebook Developer Account, you need to connect it to a messaging inbox like xpressbot.org to start sending and receiving messages.

Comments are closed.