
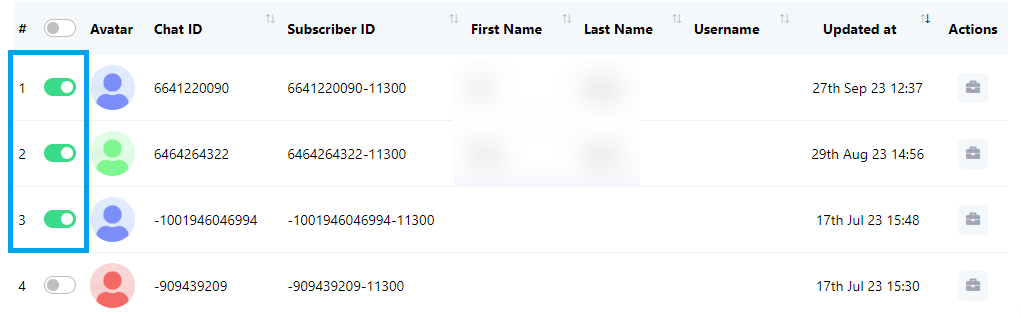
Assign Label
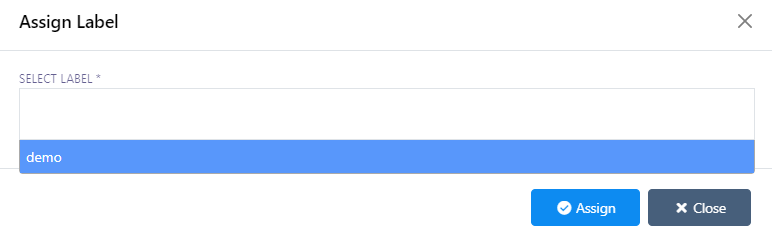
To assign subscribers to a label, follow these steps:
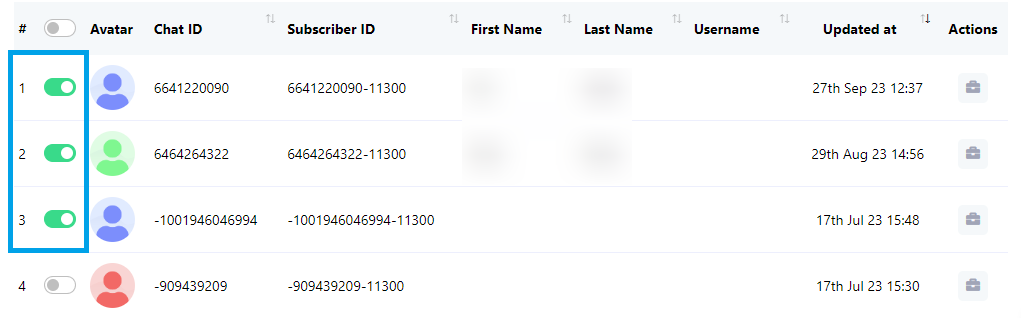
- In the list of subscribers, toggle the subscribers you want to assign to a label.
- Click on `Options` and then choose `Assign Label`.
- Select a pre-existing label from the list. Users can also select multiple labels if needed.
- Click the `Assign` button to complete the assignment process.
Assign Sequence
To assign subscribers to a sequence, follow these steps:
- In the list of subscribers, toggle the subscribers you want to assign to a sequence.

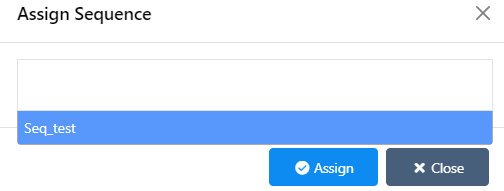
- Click on `Options` and then choose `Assign Sequence`.
- Select a pre-existing sequence from the list. Users can also select multiple sequence if needed.
- Click the `Assign` button to complete the assignment process.
Delete Subscribers
To assign subscribers to a sequence, follow these steps:
- In the list of subscribers, toggle the subscribers you wish to delete. You can toggle a single subscriber or multiple subscribers according to your preferences.
Click on the `Options` menu and select `Delete Subscriber`.
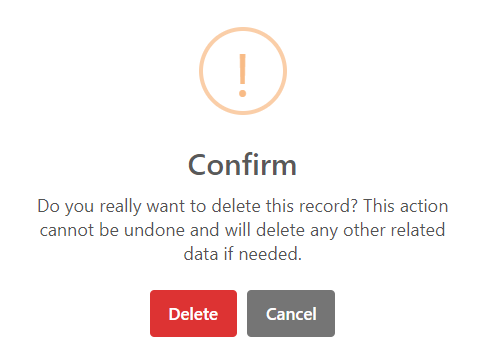
- Confirm the deletion by clicking the `Delete` button.
Subscriber Actions
For Subscriber Actions, follow these steps:
- Click on the `Subscriber Action` button.

In the modal, you can perform various actions, including unsubscribing a subscriber, pausing or resuming the bot`s replies, resetting the user`s input flow, or syncing subscriber data.
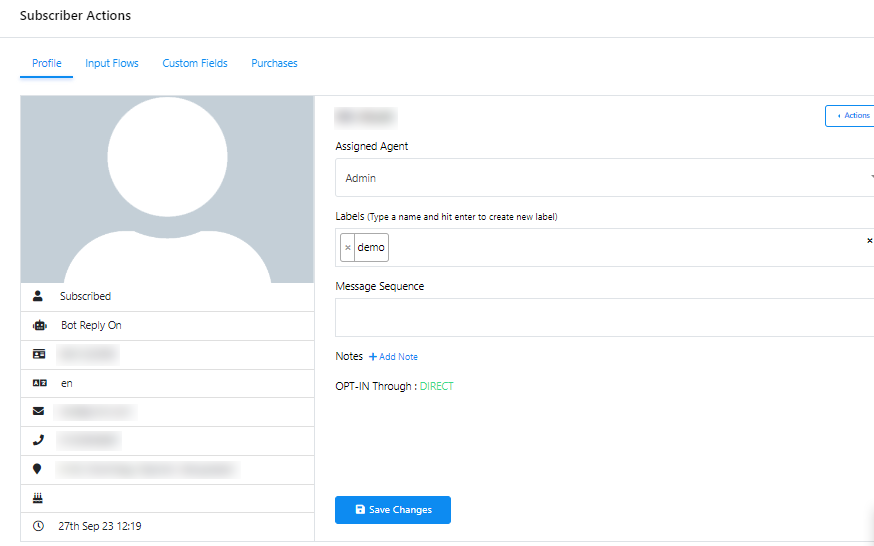
- Click on `Assigned agent` to designate an agent who can engage in real-time conversations with the subscriber.
- Utilize the `Labels` input field to search for and select an existing label, or you can create a new label.
- Select an existing message sequence to send to the subscriber by clicking on `Message Sequence`.
- To save all the settings you`ve configured, click on `Save Changes`.
- Access `Input Flows` to review data collected from a user`s input flow.
- Click `Custom Fields` to inspect data collected from Custom Fields.
- For an overview of every purchase made by the subscriber, click on `Purchases`.