
To send a broadcast message using variables and custom fields, you need to follow several steps that involve setting up your message template, configuring your data, and using your platform’s broadcasting tools. Here’s a detailed guide to help you through the process:
1. Understand the Basics
- Variables: These are static value that is common to all users.
- Custom Fields: These are user-specific data fields that can change based on user information or context, like
{userName}or{orderNumber}.
Once you have created a message template, you can broadcast it to your subscribers (Inactive or Imported subscribers):
- Go to the XpressBot Dashboard.
- Click on the “Broadcasting” from the “WhatsApp” sub-menu.
- Pick the bot account for which the broadcast campaign is to be created.
Then click on the “Create” button.
Broadcasting to all users (Outside 24 Hours message window)
- A visual bot flow builder will appear as soon as possible. There is available an “Action” button and a “Start-Bot-Flow” in the canvas.
- However, instantly, a “Configure Action Button” form will show on the top-right side of the canvas.
- Give a name for the campaign in the “Campaign Name” field.
- Select the “Anytime” radio button. Instantly, the “ Select template” field will occur.
- It will show the targeted Subscribers.
- Select the template from the list in the “Select template” field.
- Optionally, you can add Include/Exclude label id(s). You can also set the Sending time if you want.
- You can send it right away or you may set a scheduled time.
- By choosing the “Send later” button, you will fill up the “Schedule time” and “Time zone” fields.
- Click the “Ok” button.
- Now, to configure the “Start-Bot-Flow”, double-click on it to give the name for it and hit the “Ok” button.
- Finally, save the campaign by clicking the “Save” button.
It is noted that as soon as we save, the campaign will be created and the broadcast messages will be sent right away.
Now, you can see it in the broadcasting list. If you have done all successfully, the broadcasting campaign status will be successful.
Broadcasting to Active users (Within 24 Hours message window)
From the Visual Flow builder, just select the “24 hours” radio button. This will enable broadcasting to active users only. It will also show the total number of targeted subscribers. For active users (who have sent messages in the last 24 hours), you can send any kind of message.
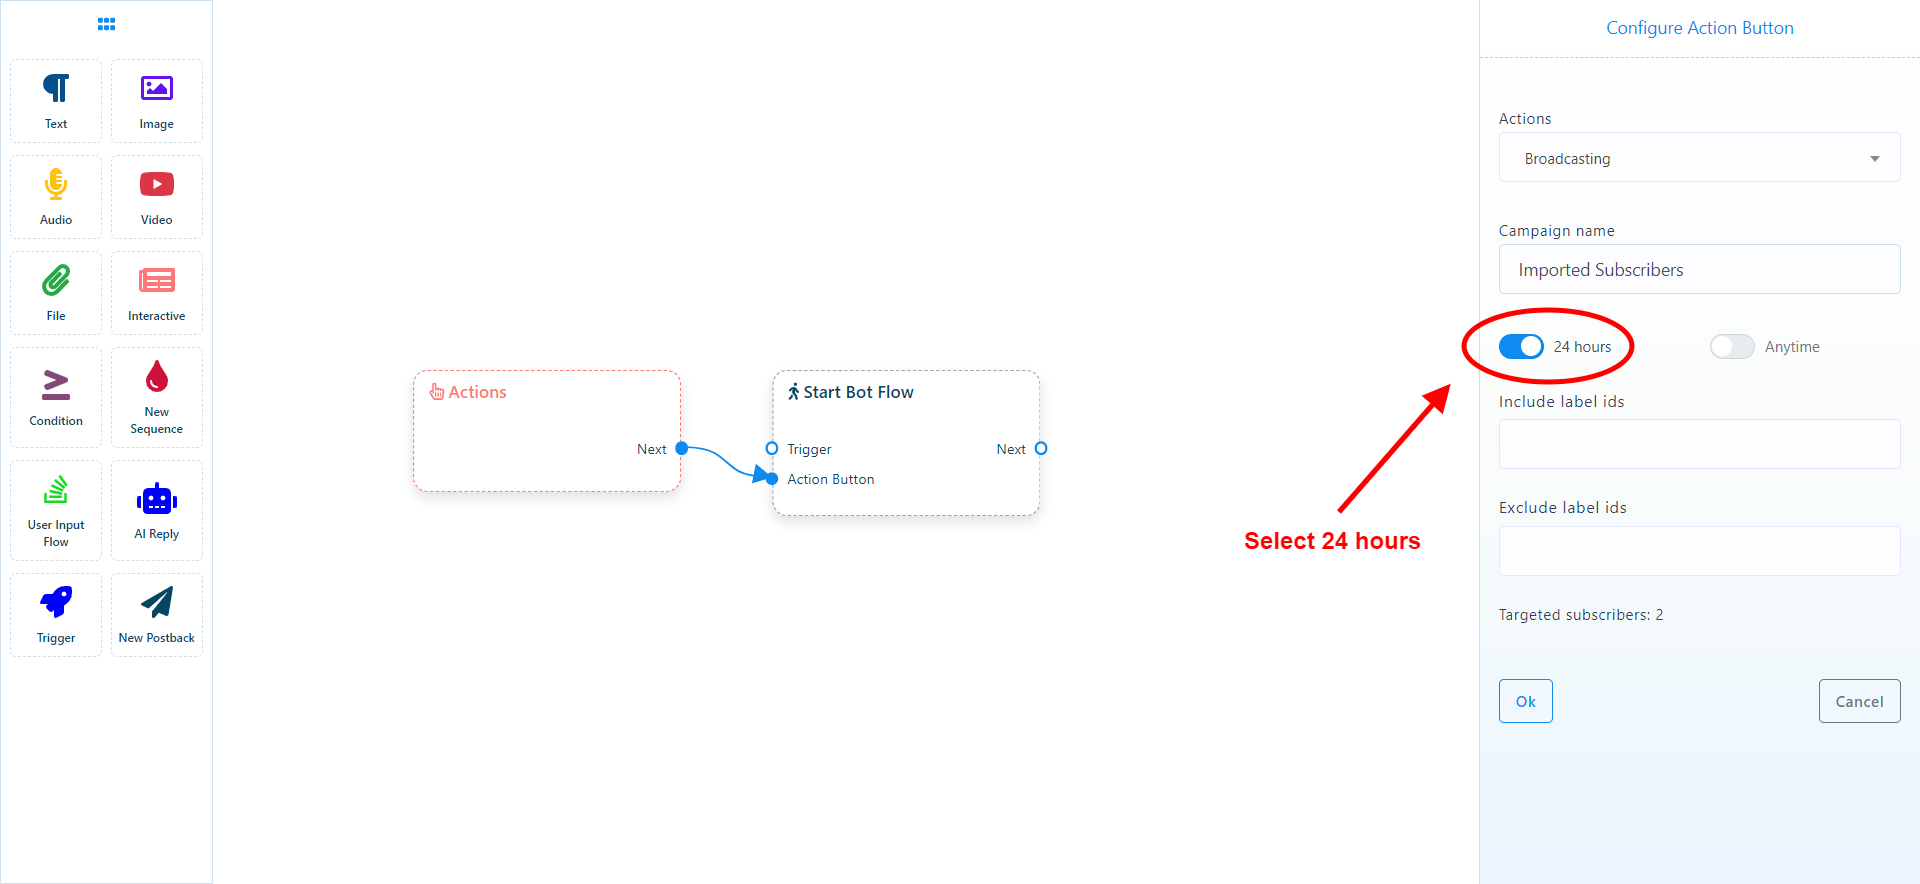
We can optionally include or exclude subscribers by using a label. For example, if you want to exclude subscribers with a certain label, then you will add that label in the exclude field. Finally, click on the “Ok” button.
Now, double-click on the Start Bot Flow.
Give a name for it and click on the “Ok” button. Now, you can add any message (Text, Image, Audio, Video, File, Interactive, Condition, etc.) according to your needs with the Start Bot Flow. Finally, just save the campaign. That’s it; the broadcasting campaign will start sending messages to subscribers.