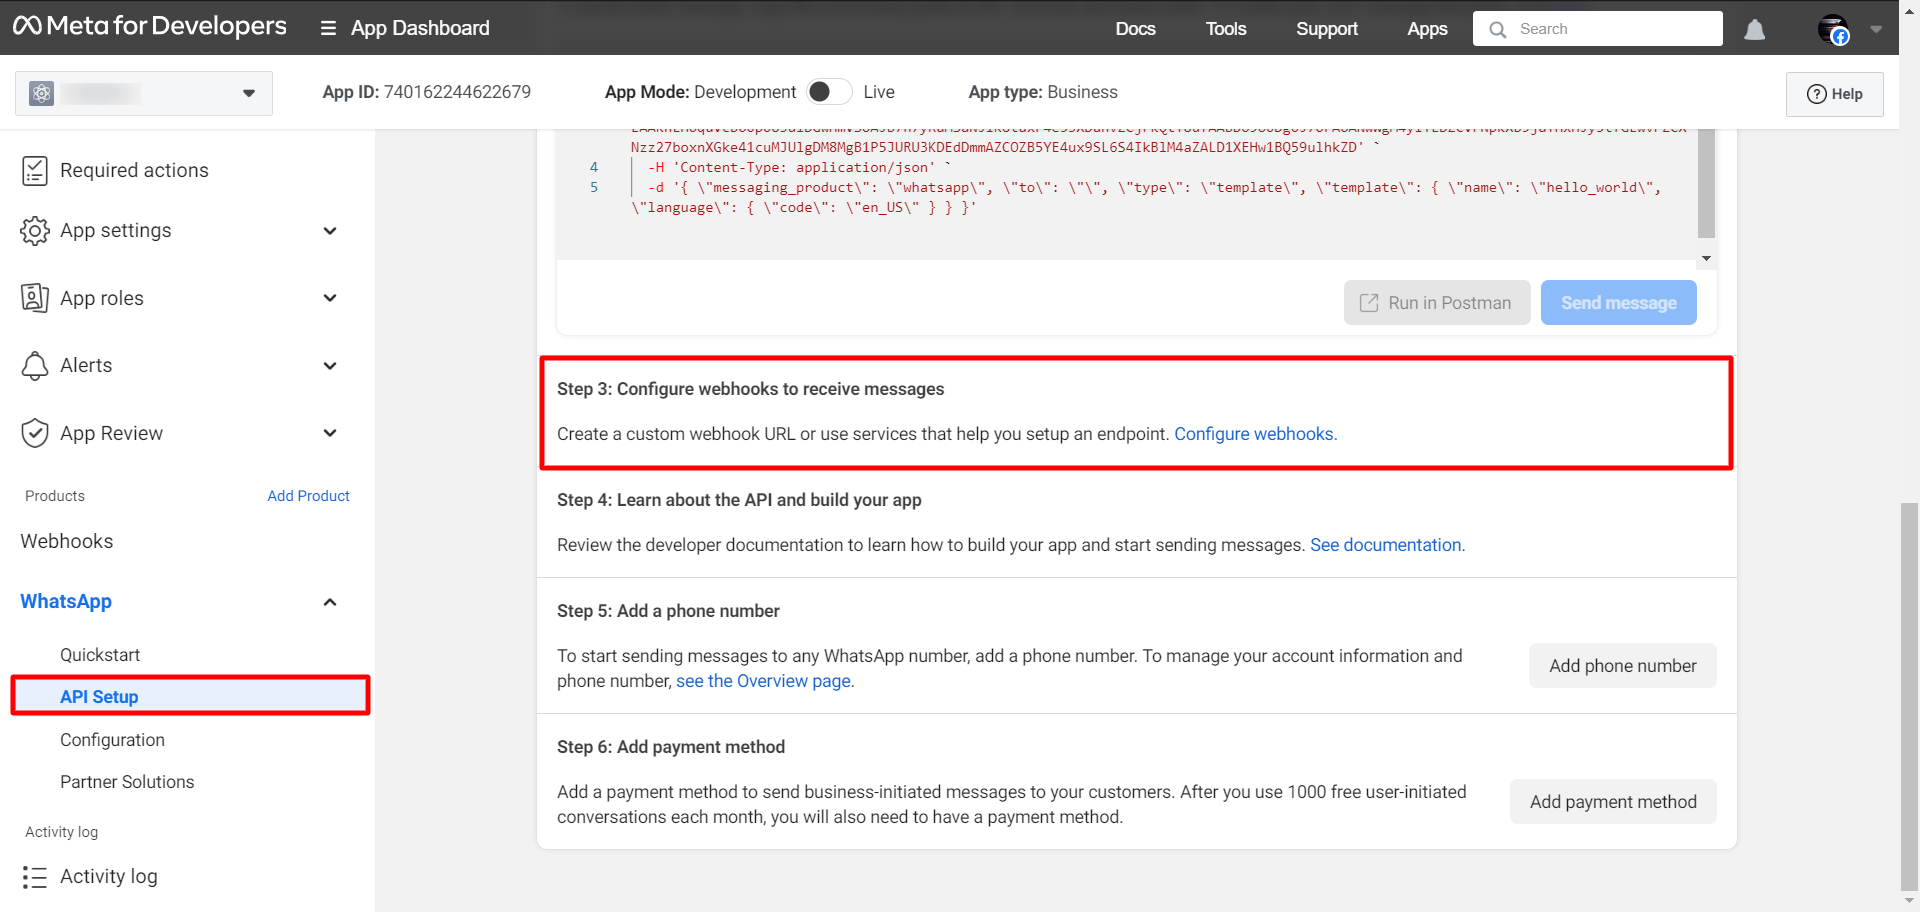
Now, you have to configure the webhook to receive messages. To configure webhooks, go to step 3 and click on the Configure webhooks button.
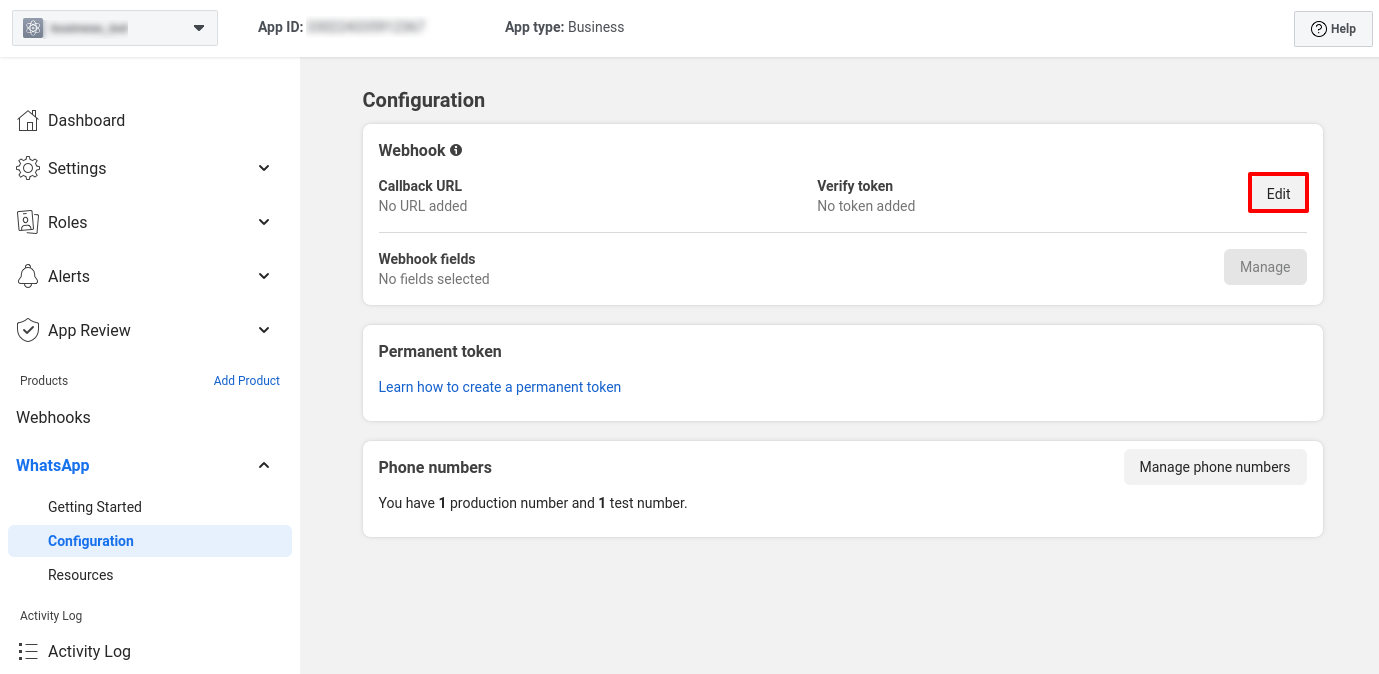
Instantly, a page called Configuration will appear.
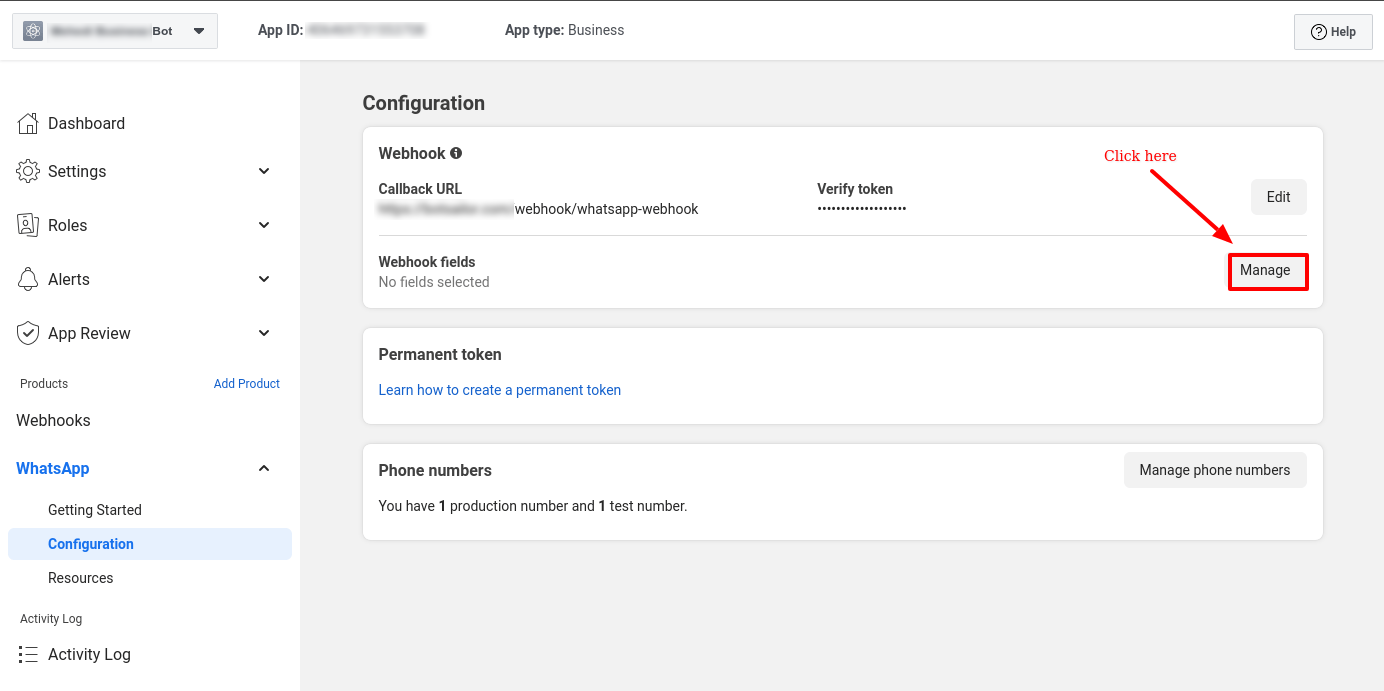
In the webhook section, you will see an edit button. Now click on the edit button.
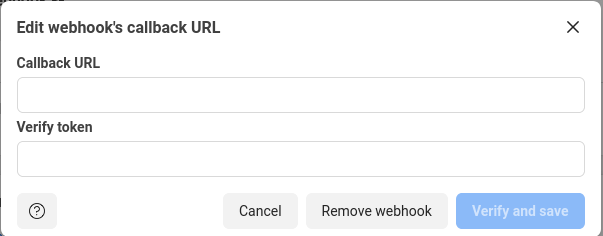
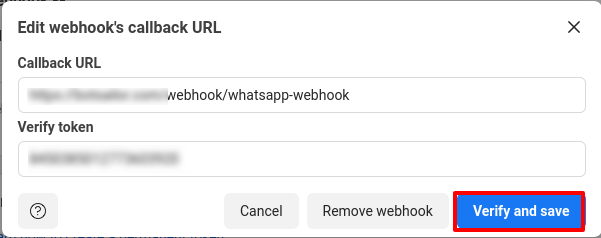
Instantly, a pop-up form will appear with two fields — Callback URL and Verify Token. Now you have to provide a callback URL and verify the token.
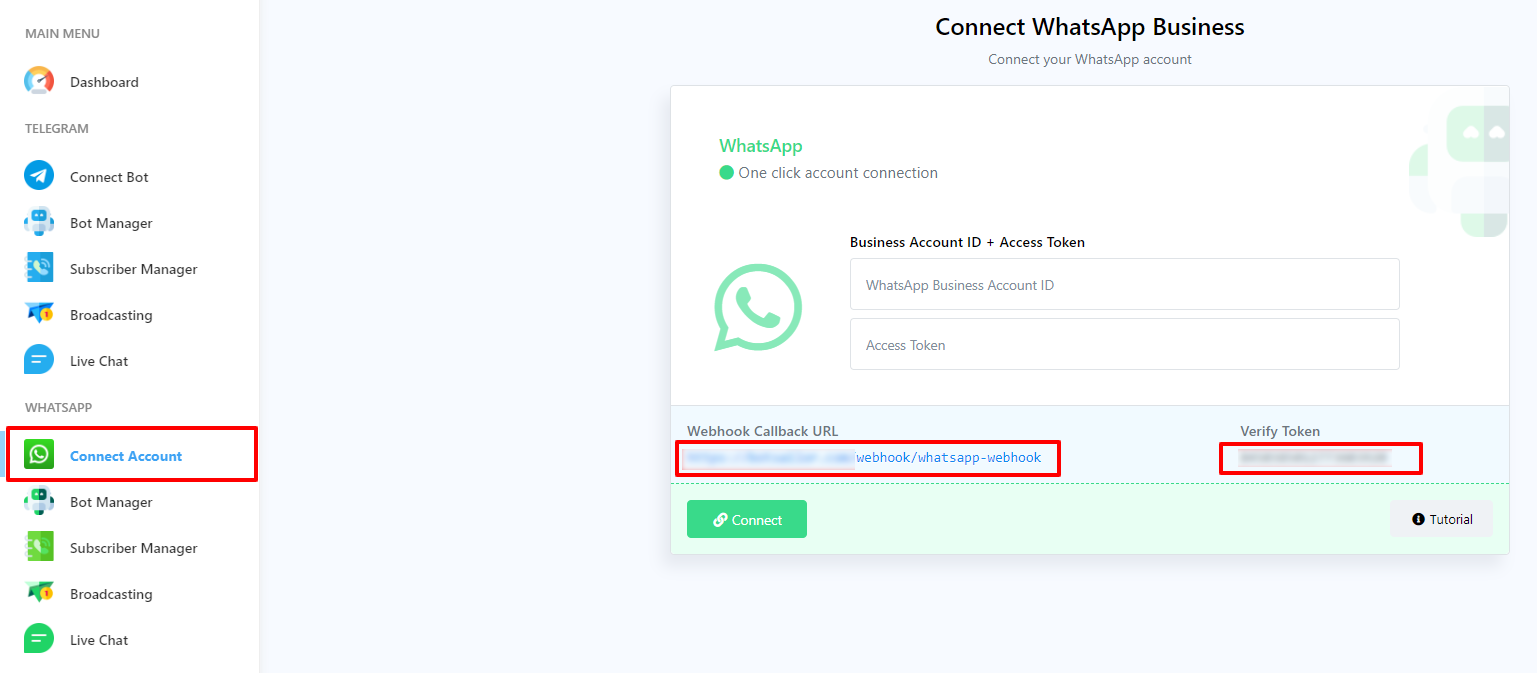
To get the callback URL and verify the token to XpressBot. Login to your account and go to the dashboard of XpressBot. At the left sidebar of the Dashboard, under the WhatsApp section, you will see connect WhatsApp option. Now click on the connect whatsApp menu and instantly, Connect WhatsApp Business page will appear.
At the top of the page, you will see Webhook Callback URL and verify token. Copy them and return to the Configuration page of developer facebook.
Then paste the Webhook Callback URL and verify token in the callback URL and verify token fields respectively. Now click on the verify and save button.
Now you have to select webhook fields. To select webhook fields, click on the Manage button.
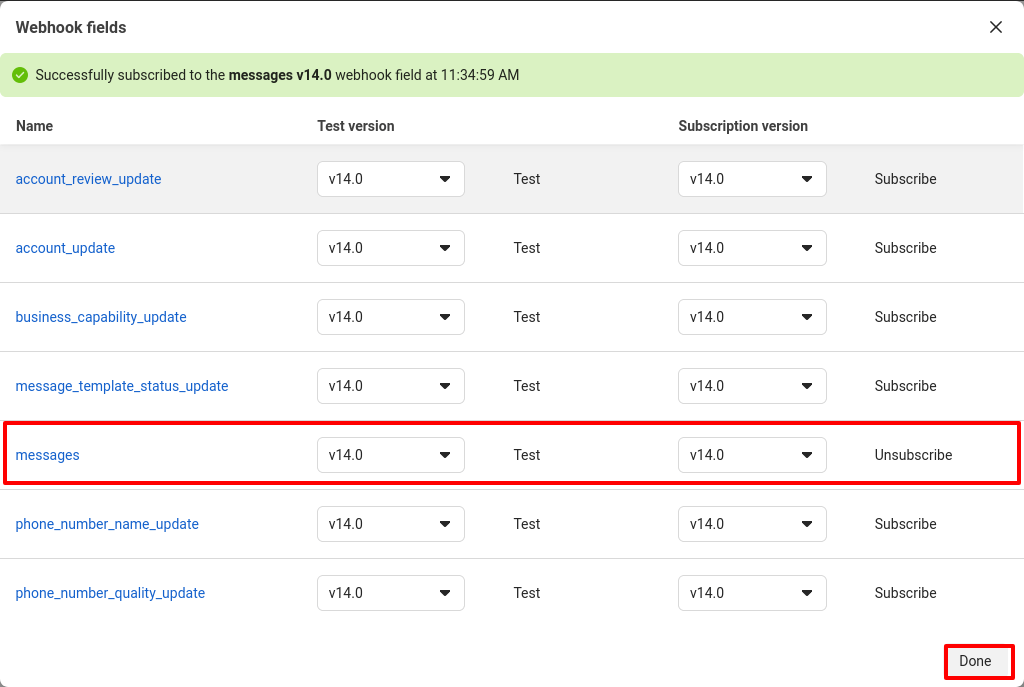
Instantly, a pop-up modal will appear with some webhook fields. Now subscribe Message webhook field. Now click on the Done button.
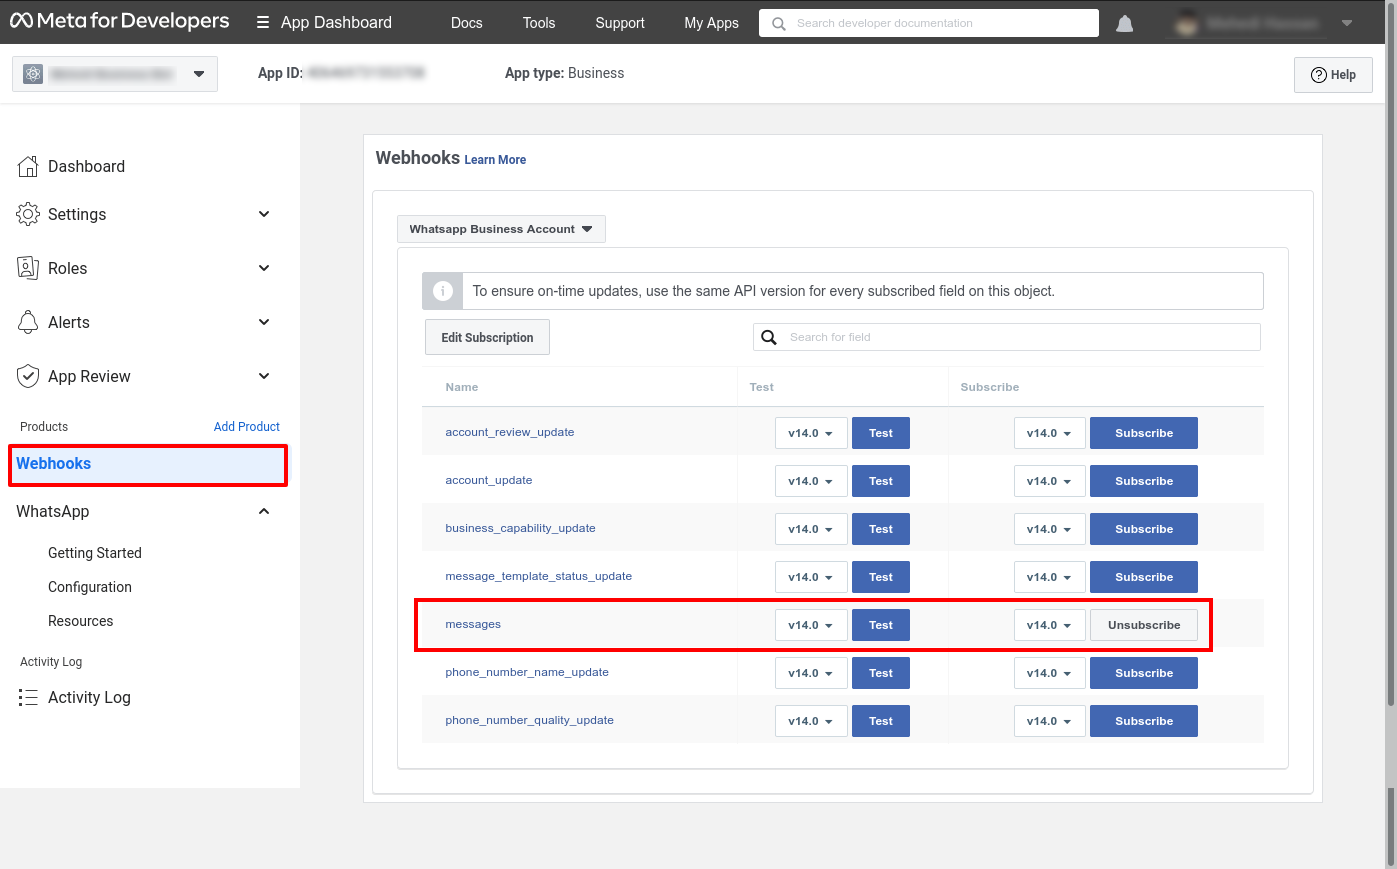
You can also subscribe and unsubscribe to webhooks on the webhooks page. Click on the webhooks menu and the webhook page will appear with some webhook fields. On the page, you can subscribe to and unsubscribe to any webhook field.
If you’re looking to enhance your knowledge on webhooks and messaging systems, you might want to explore more about webhooks on Wikipedia. Speaking of webhooks, you might be interested in Webhook and how they function in various online platforms. Additionally, understanding the concept of messaging protocols can be beneficial. You may find it intriguing to learn about messaging protocols by checking out Messaging Protocol on Wikipedia. These articles provide in-depth insights into the world of webhooks and messaging systems.

Comments are closed.