
Migrating an existing WhatsApp Business API account to XpressBot #
You can migrate your existing WhatsApp Business API account from another Business Solution Partner to XpressBot by following the guides outlined in this article.
What can be migrated? #
The table below outlines the items that can and cannot be migrated from your existing WhatsApp Business API account:
| ✅ Can be migrated | ❌ Cannot be migrated |
| Quality rating | Chat history |
| Any approved high quality message template | Low quality, rejected, or pending message templates |
| Official Business Account Status (green tick) | |
| Display name | |
| Messaging limit |
Preparing for migration #
The following items are mandatory for processing your migration request:
- Facebook personal account with full access rights in Facebook Business Manager. You can check your access here.

- Facebook Business verification status is “Verified”
- Phone number is active to receive verification code via SMS or phone call
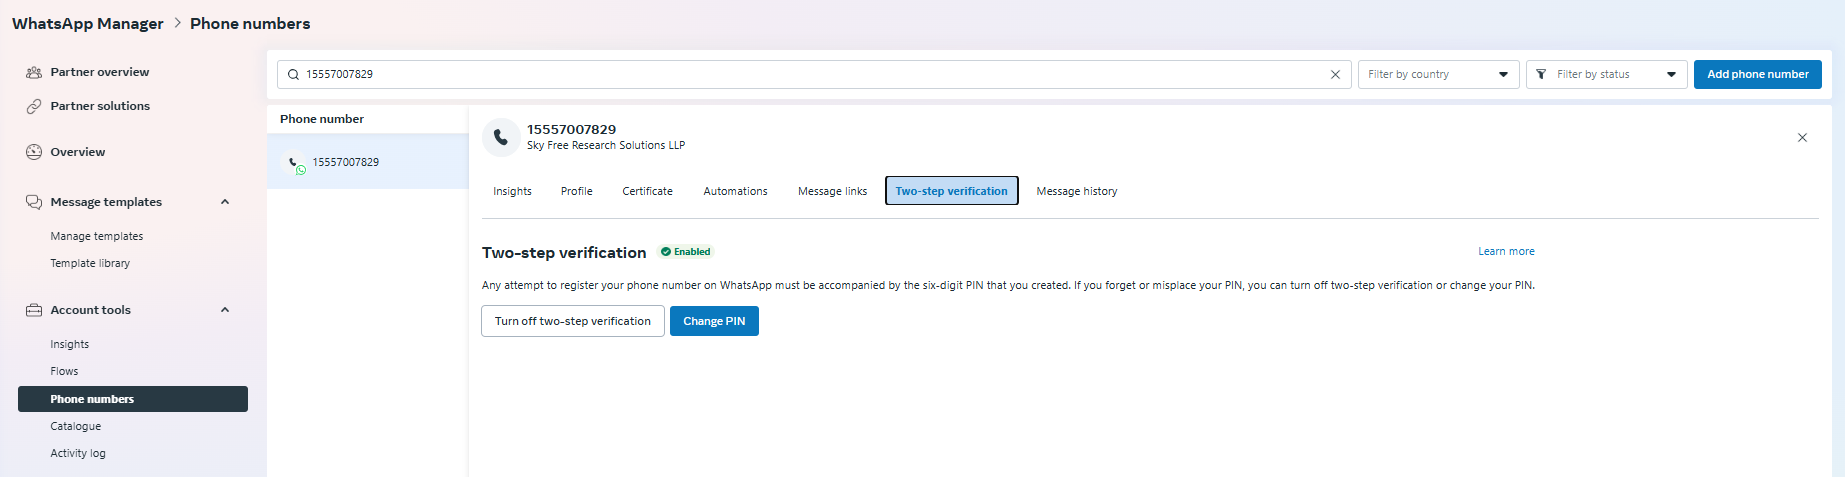
- Turn off 2-step verification in WhatsApp Manager. Learn how to turn off 2-step verification here.
Step-by-step migration guide #
Step 1: Disable Two-Step Verification from WhatsApp Manager
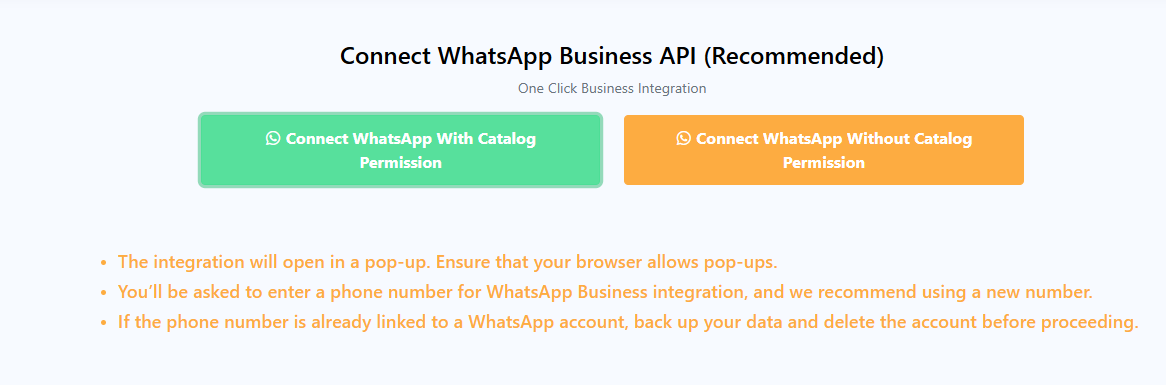
Step 2: Login to Xpressbot and click the Embedded Signup
Step 3: You will see a separate pop up window. Please sign in to your personal Facebook account that has full access rights in the Facebook Business Portfolio.
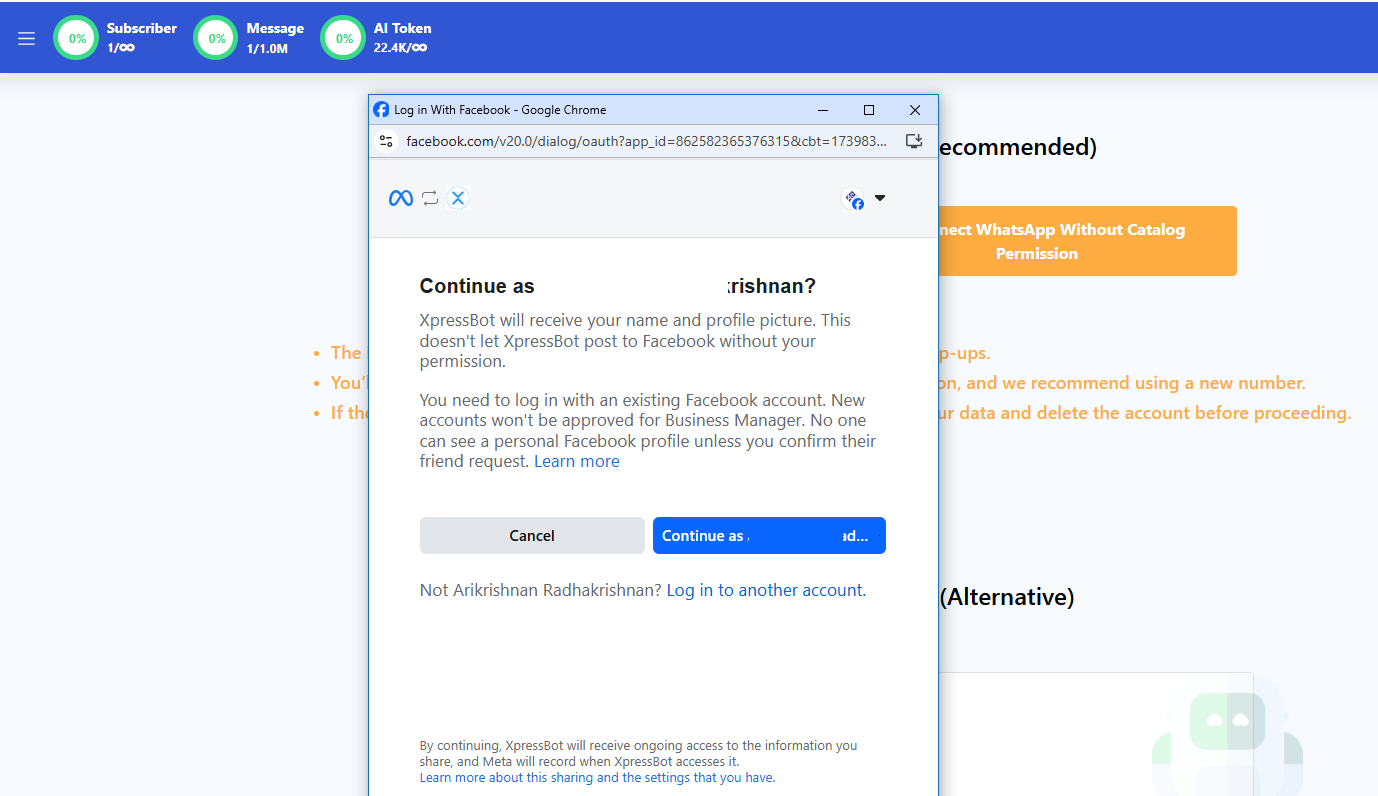
Step 4: Once signed in, click “Continue” to proceed to the next step. If you are not on the correct account, click “Log into another account” to return to the previous step.
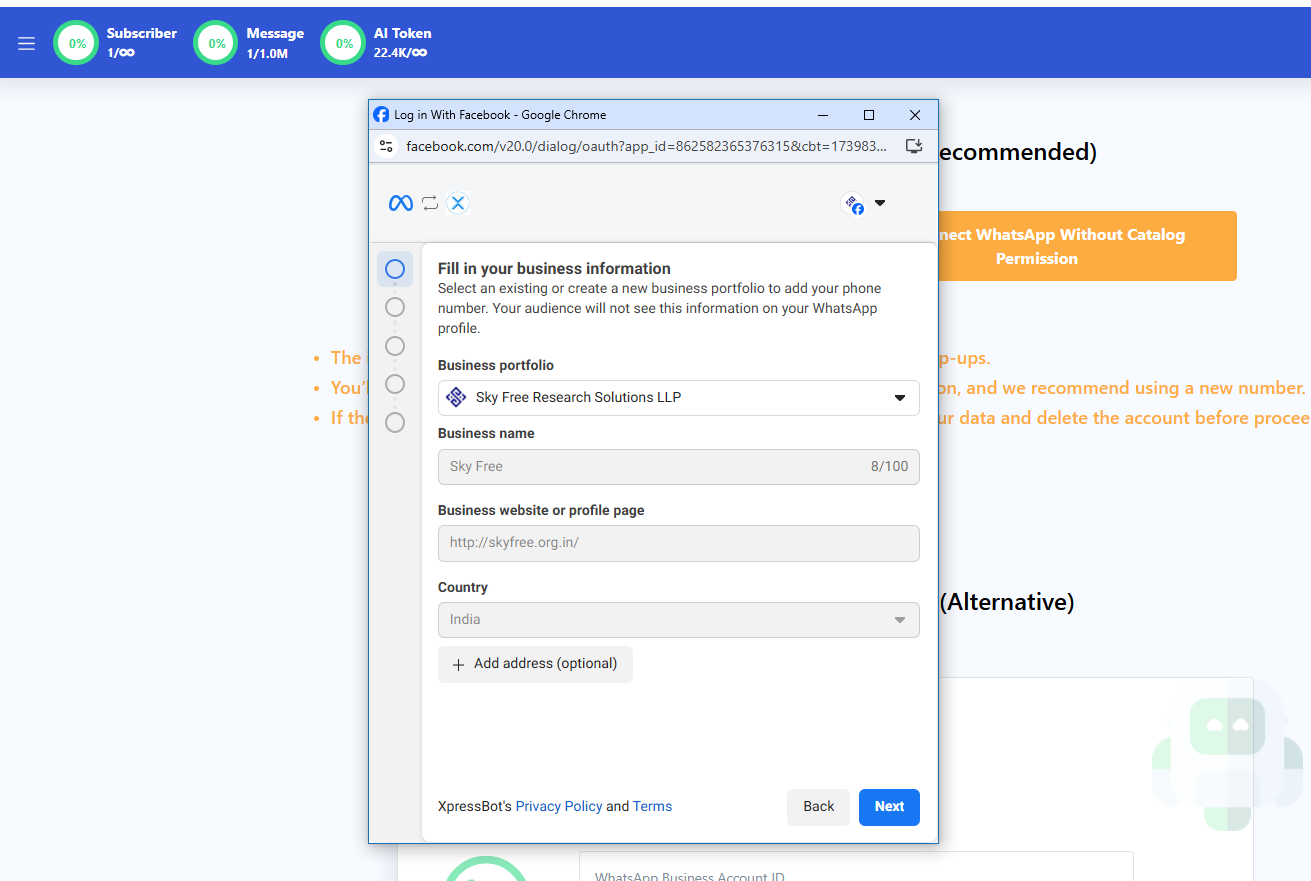
Step 5: You will be asked to fill in your business information. Ensure the business portfolio that you have selected here is the same as that with the WhatsApp Business API account you are looking to migrate. Click “Next” to proceed.
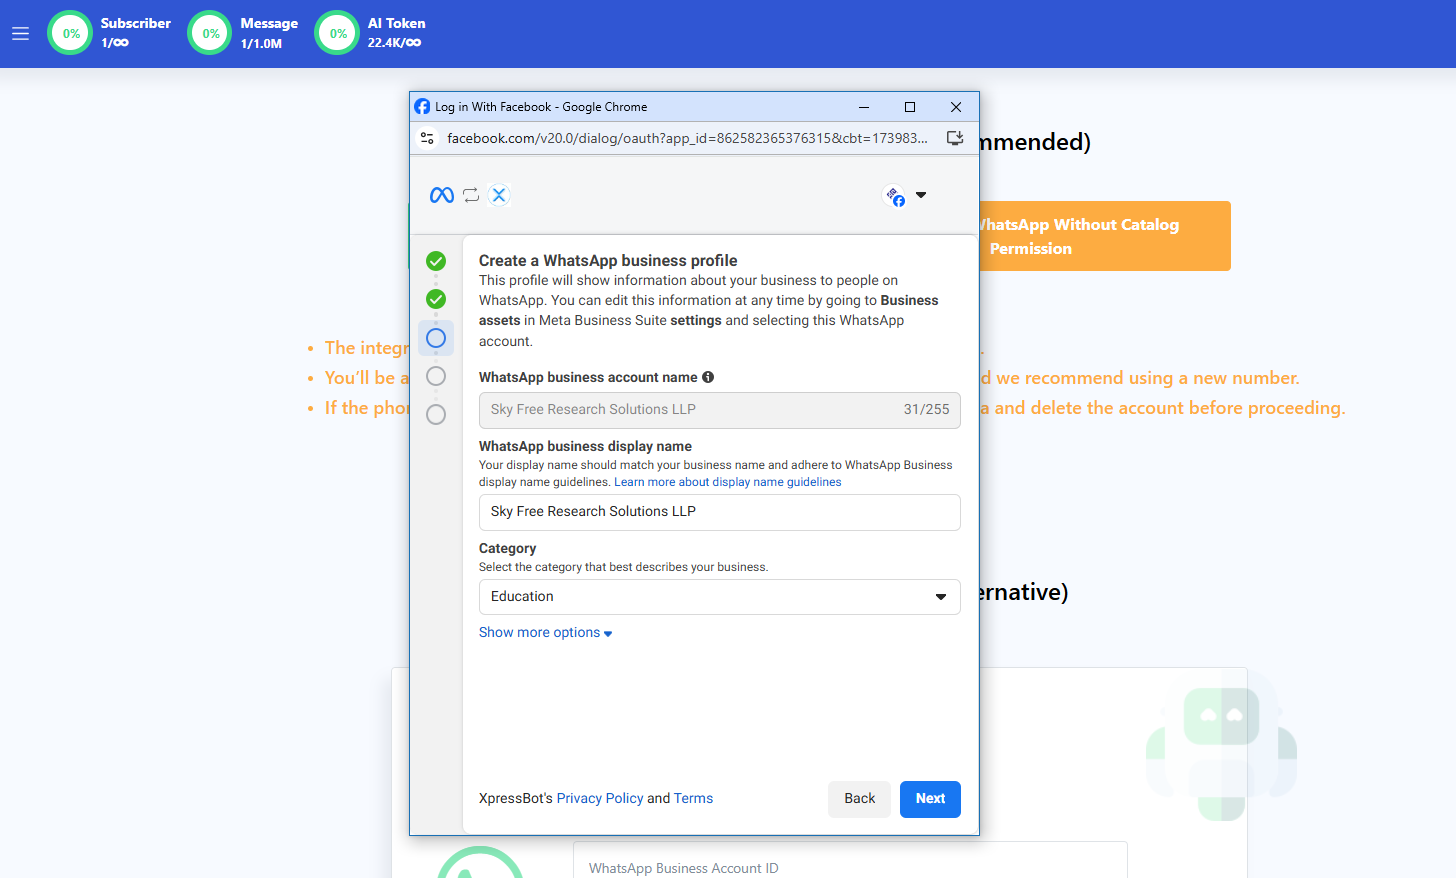
Step 6: Next, under Choose a WhatsApp Business Account, choose “Create a WhatsApp Business account”
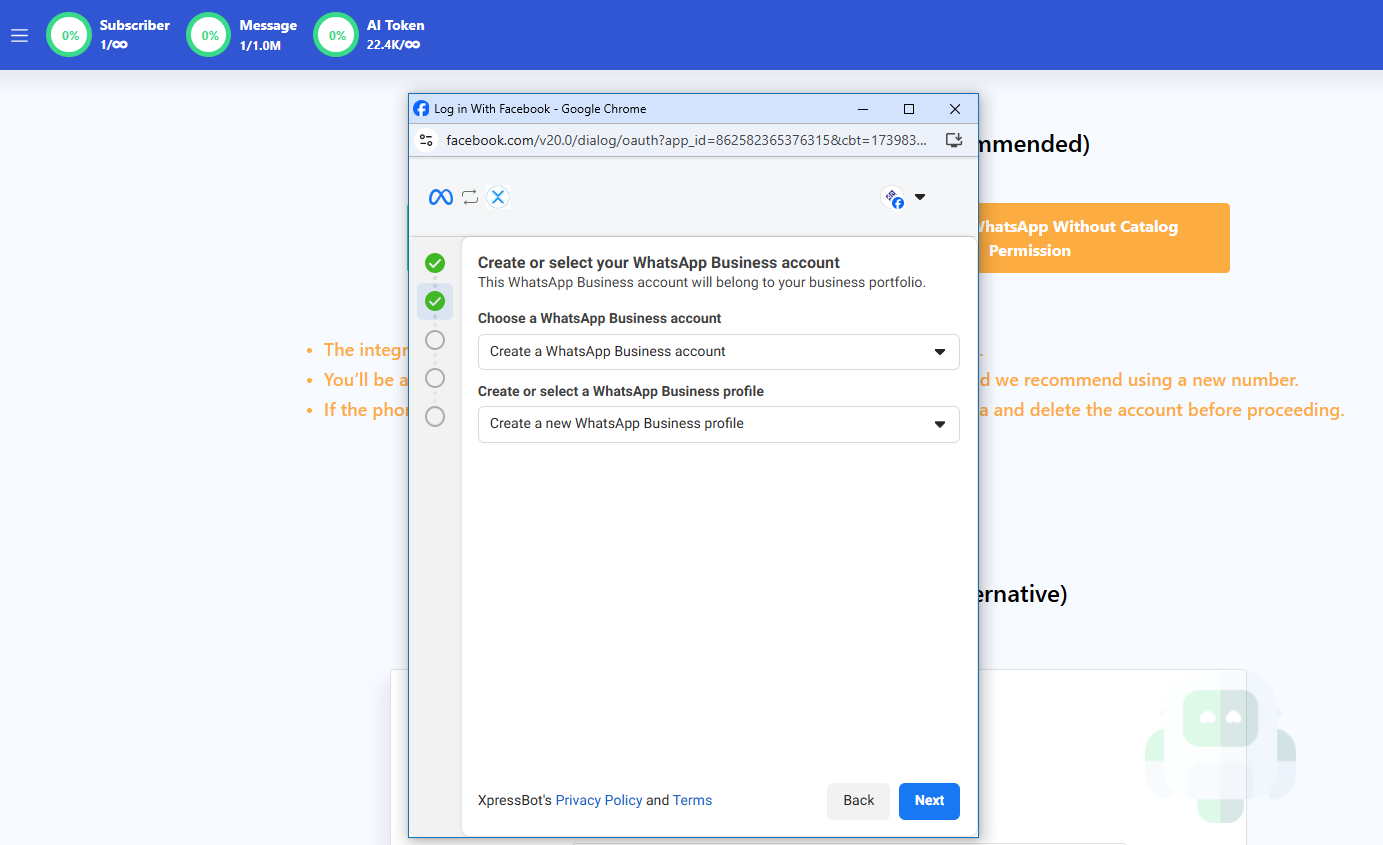
Then, input the name in the text box under WhatsApp Business Account Name. This name is for internal reference only and will not be disclosed to the public. Under “Timezone”, choose the timezone your business is in. Click”Next” to continue.
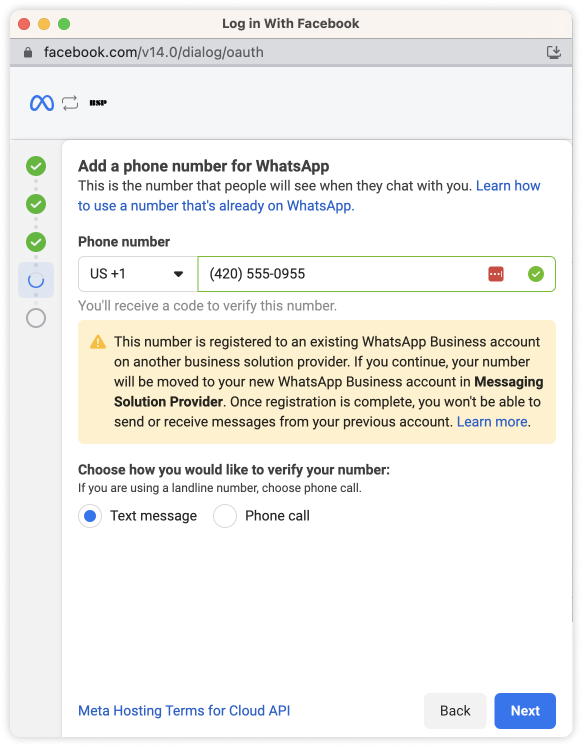
Step 7: While adding your number, you will get the below message, then proceed to complete registration.
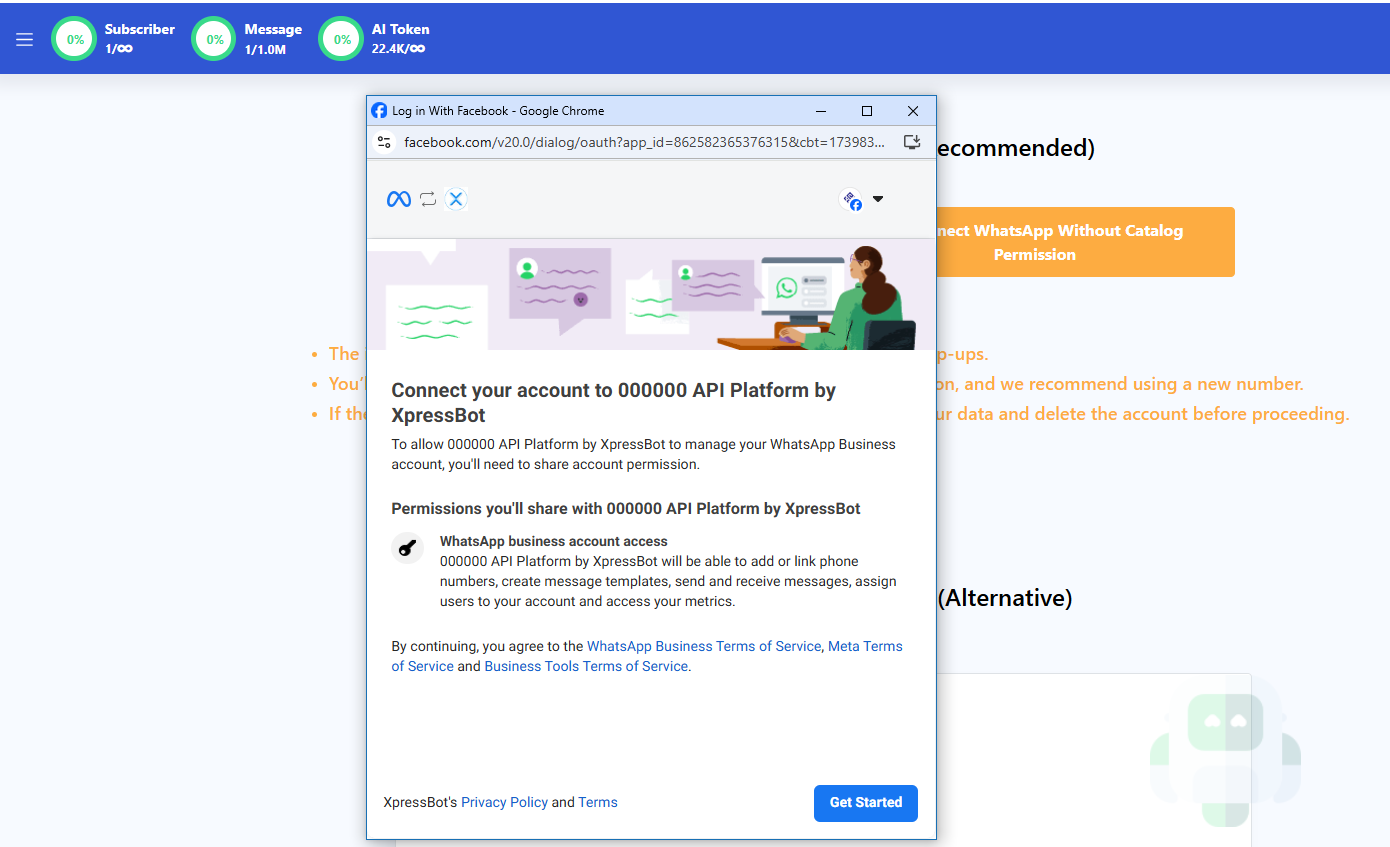
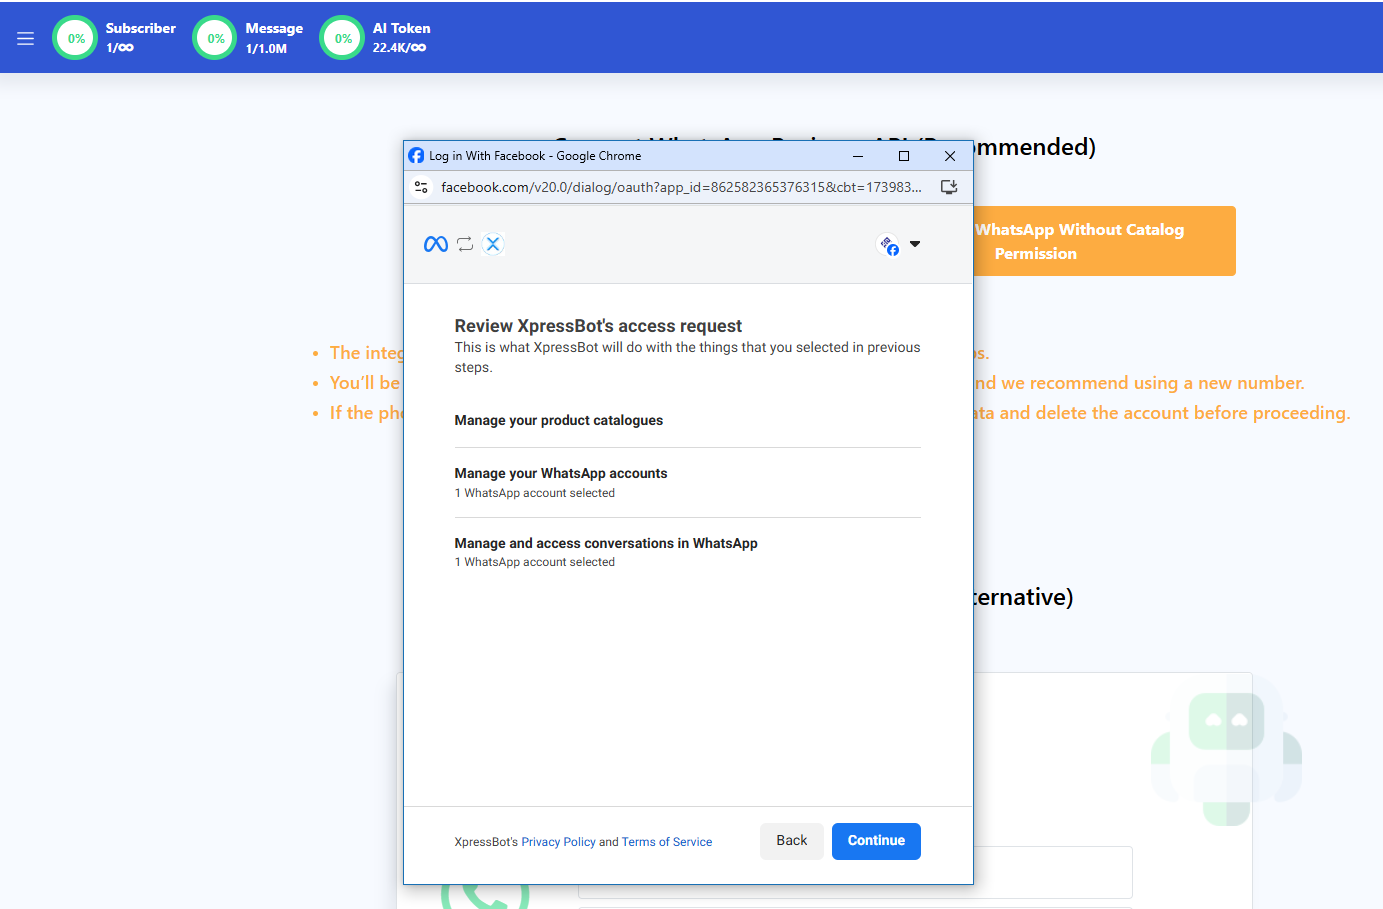
Step 8: Review the permission you are granting to XpressBot. If all sounds good, click “Continue”.
Step 9: Now the number will be migrated to XpressBot
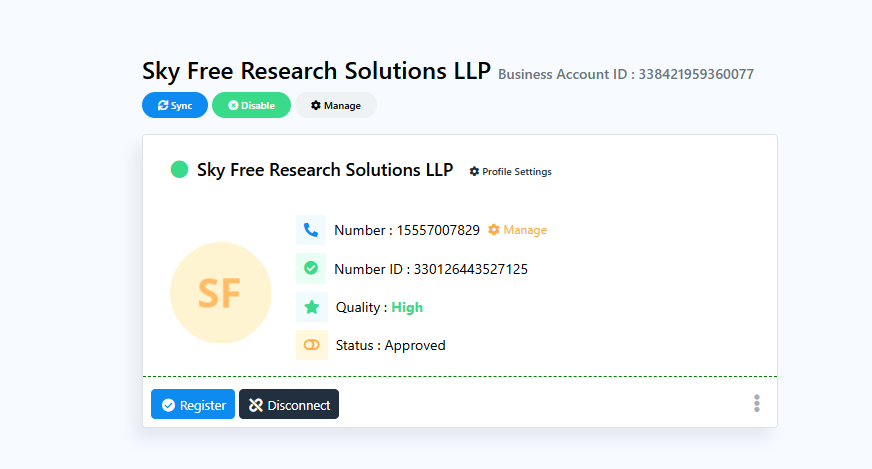
Step 10: Now the number will be migrated to XpressBot