How to Deliver Shopify Order Notifications to Customers via WhatsApp Using Xpressbot
Introduction
In today’s fast-paced e-commerce landscape, timely communication with customers is crucial. Sending order notifications via WhatsApp can enhance customer experience, keeping them informed and engaged. Xpressbot is a powerful tool that simplifies this process, allowing Shopify merchants to seamlessly integrate WhatsApp notifications into their workflow.
Benefits of Using WhatsApp for Notifications
- Instant Communication: WhatsApp messages are often read within minutes, ensuring customers receive updates promptly.
- High Engagement Rates: With a vast user base, WhatsApp boasts high engagement, making it more likely that customers will see your messages.
- Personalized Experience: Sending notifications via WhatsApp allows for a more personal touch, enhancing customer satisfaction.
Setting Up Xpressbot for Shopify Notifications
- Create an Account: Sign up for an Xpressbot account and link it to your Shopify store.
- Connect WhatsApp: Integrate your WhatsApp Business API to enable messaging capabilities.
- Configure Notifications: Set up templates for various notifications such as order confirmations, shipping updates, and delivery notifications.
- Automate Workflows: Use Xpressbot’s automation features to trigger messages based on specific events in Shopify, like order placement or status changes.
Types of Notifications to Send
- Order Confirmation: Notify customers immediately after their order is placed.
- Shipping Updates: Provide real-time tracking information as orders are shipped.
- Delivery Notifications: Inform customers when their orders are out for delivery or have been delivered.
- Follow-Up Messages: Send messages post-delivery to request feedback or encourage reviews.
Best Practices
- Keep Messages Concise: Ensure your notifications are clear and to the point.
- Include Call-to-Actions: Encourage customers to reach out if they have questions or concerns.
- Respect Privacy: Always obtain consent before sending WhatsApp messages to customers.
To send Shopify order notifications via WhatsApp using Xpressbot, follow these steps:
Step 1: Create a Message Template in Xpressbot
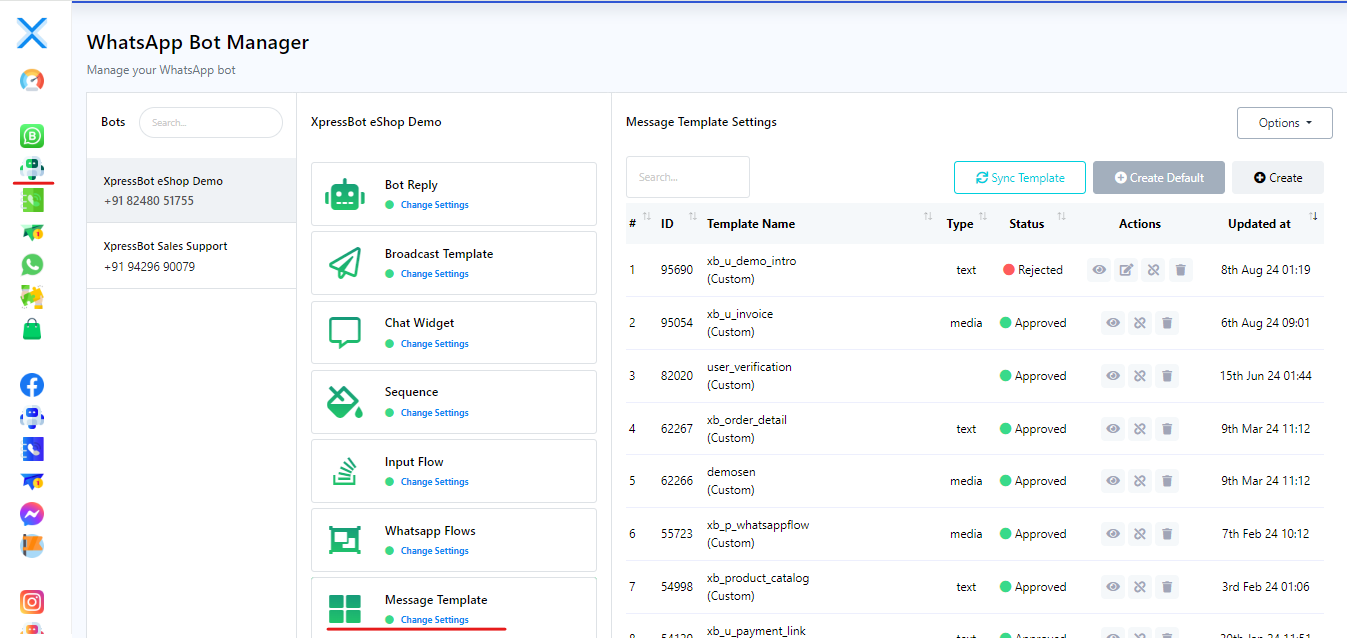
- Access Xpressbot Dashboard: Log in to your Xpressbot account.
- Navigate to Bot Manager: Click on the “Bot Manager” option in the left sidebar.
- Create a Message Template: Select the “Message Template” option to open the settings page.
- Design Your Template: Here, you can customize the message template that will be sent as Shopify notifications.
Step 2: Set Up a Webhook Workflow
- Create a New Webhook: In the Xpressbot dashboard, create a new Webhook workflow.
- Integrate with Shopify: Add the Webhook to your Shopify store to enable communication.
- Map Data: Ensure that you map the relevant data fields from Shopify to your Xpressbot message template.
Step 3: Finalize Your Message Template
- Return to Bot Manager: Go back to the Bot Manager section if you need to adjust your message template.
- Customize Notifications: Make sure your message template is tailored for different types of notifications, such as order confirmations, shipping updates, and delivery notifications.
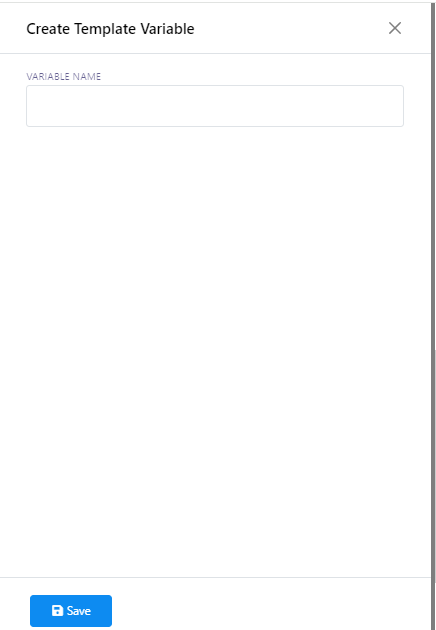
At the bottom of the page, you will see the Template variable section.

To create a variable, click the “Create” button. A pop-up form will appear with a field labeled “Variable Name.” Enter your desired name for the variable in this field, then click the “Save” button. Your variable will be created immediately.
Steps to Create a Message Template
- Click on “Create”: In the Message Template settings section, click the “Create” button.
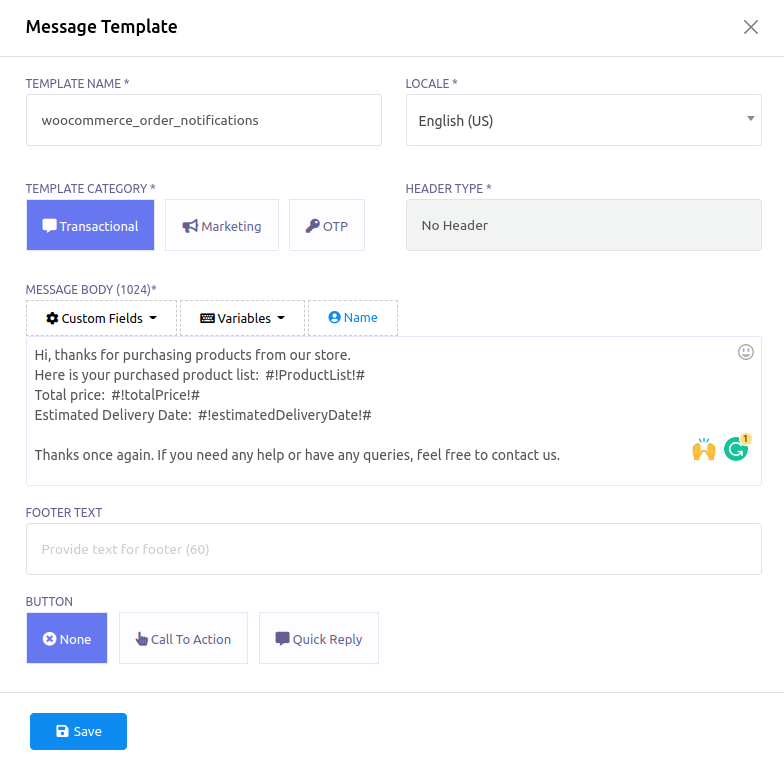
- Fill Out the Modal Form: A modal titled “Message Template” will appear.
- Enter Template Name: Provide a name in the “Template Name” field.
- Compose the Message: Write your message in the “Message Body” and insert the variables as needed.
- Save the Template: Click the “Save” button to finalize your message template.
Now you have to check the status of the message template. Click on the Check status button to see the status of the message template.
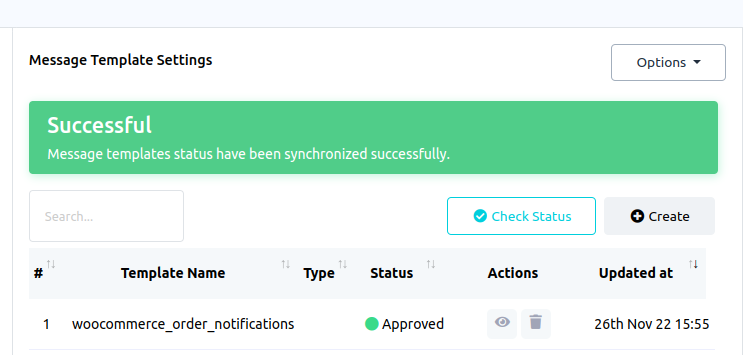
If the status is approved, you can proceed to use the message template.
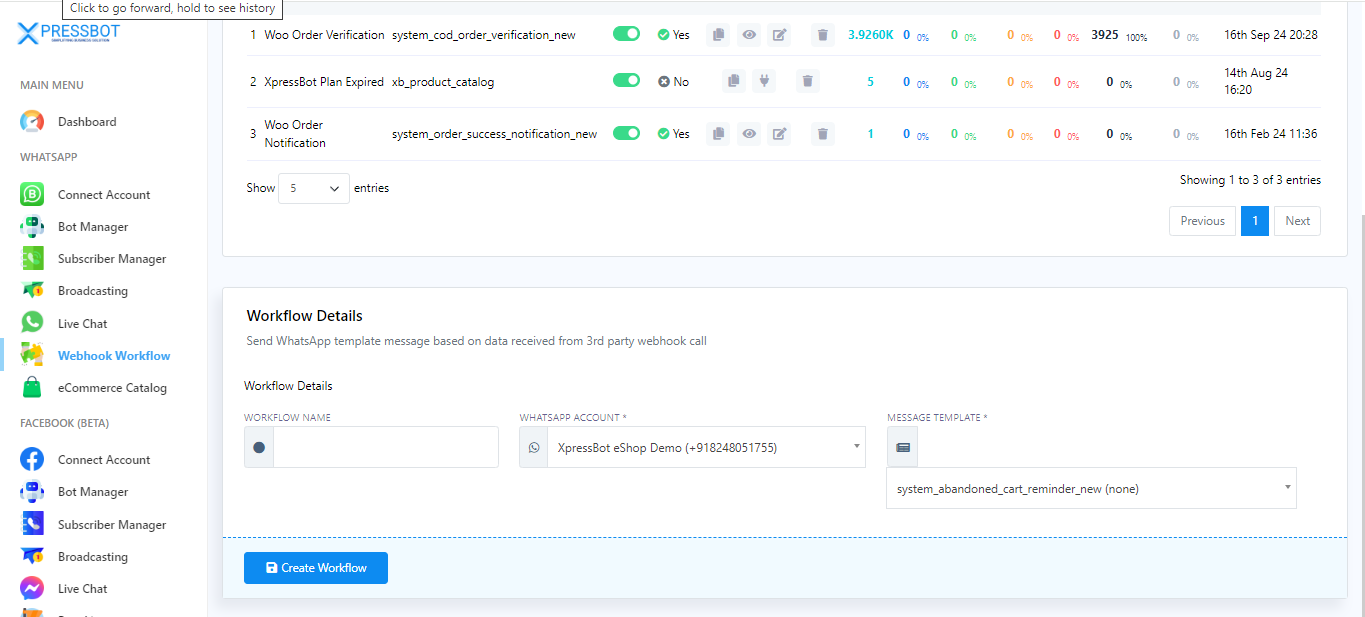
Creating a Webhook Workflow
- Access the Webhook Workflow Menu: Click on the “Webhook Workflow” option in the left sidebar of the dashboard.
- Initiate Workflow Creation: The WhatsApp Webhook Workflow page will appear. Click the “Create” button to start a new workflow.
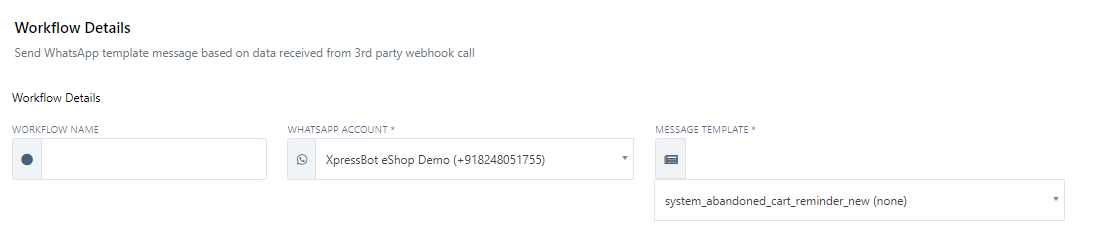
- Fill in Workflow Details: A “New Workflow” section will appear at the bottom of the page.
- Name Your Workflow: Enter a name in the “Workflow Name” field.
- Select WhatsApp Account: Choose the WhatsApp account from which you want to send messages.
- Choose Your Message Template: Select the message template you previously created.