To configure settings, follow these steps:
Start by navigating to the Bot Manager Page from the Dashboard. Click on the `Configuration` option.
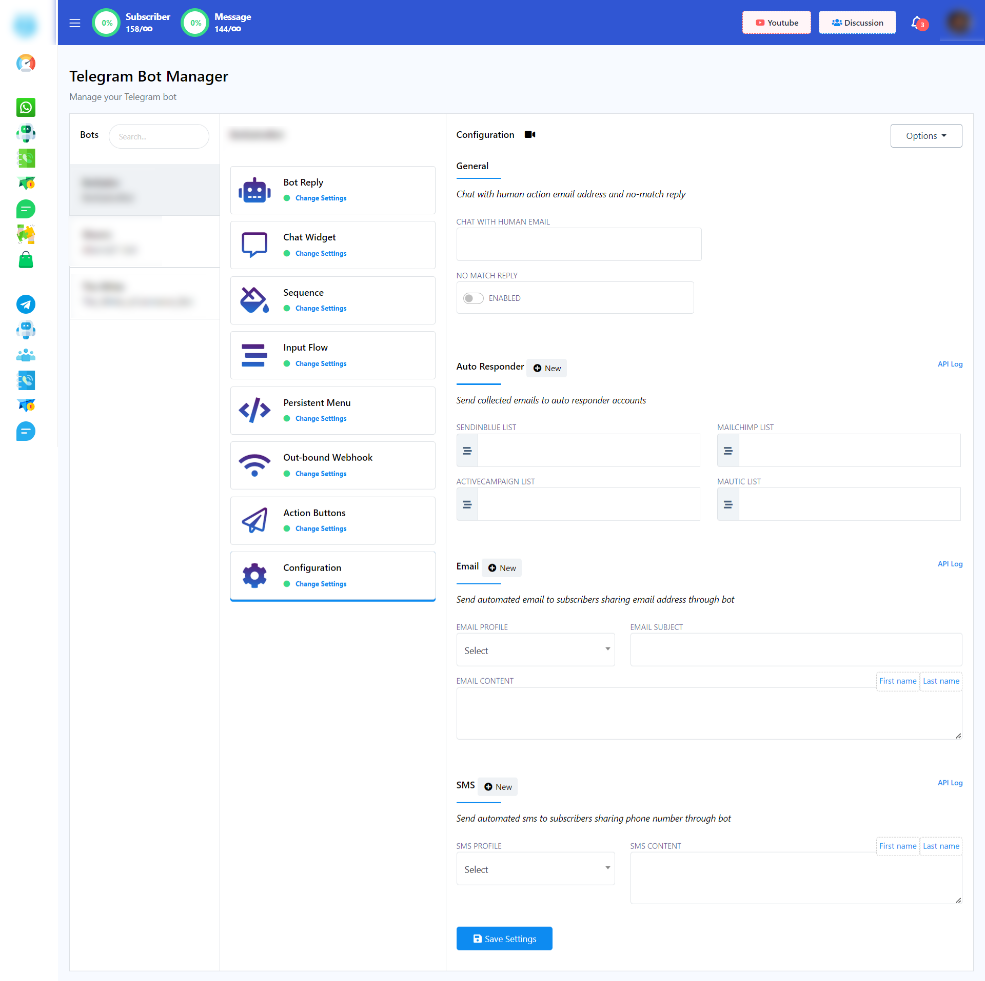
General Configuration
Chat with Human Email: In the `Chat with Human Email` field, you must provide an email address. When a subscriber clicks on the `Chat with Human` button, an automatic email will be dispatched to the email address you`ve specified. This means that you will receive notifications via the provided email address when a subscriber wants to initiate a conversation with a human agent.
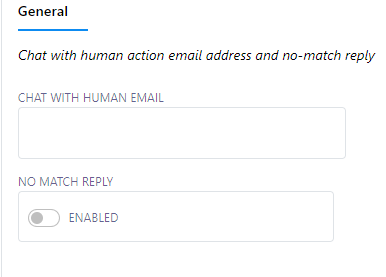
No Match Reply: Within the `No Match Reply` field, you will find a radio button. Users can choose to enable or disable this radio button. When the radio button is enabled, the `No Match Reply` template will be sent if no keywords match the user`s input. Conversely, when the radio button is disabled, no response will be generated when there is no match for the user`s input.
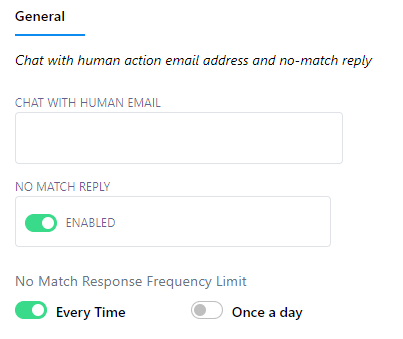
The no match reply response frequency limit for a bot account is the maximum number of times that the chatbot can respond with a `No Match Template` response. In this case, if the `Every Time` toggle button is on, then the chatbot will send the `No Match template` every time it can’t identify the proper response. In the other case, if the `Once a day` toggle button is selected, then the chatbot will send the `No Match template` only once a day if it can’t match any bot replies.
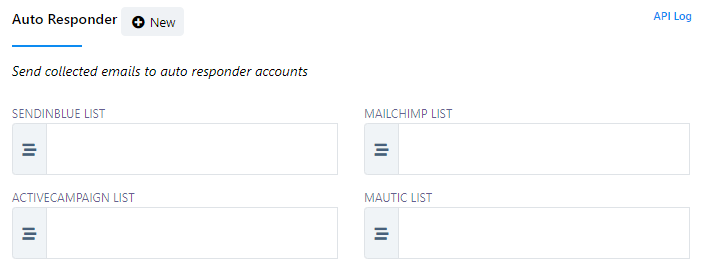
Auto Responder Configuration
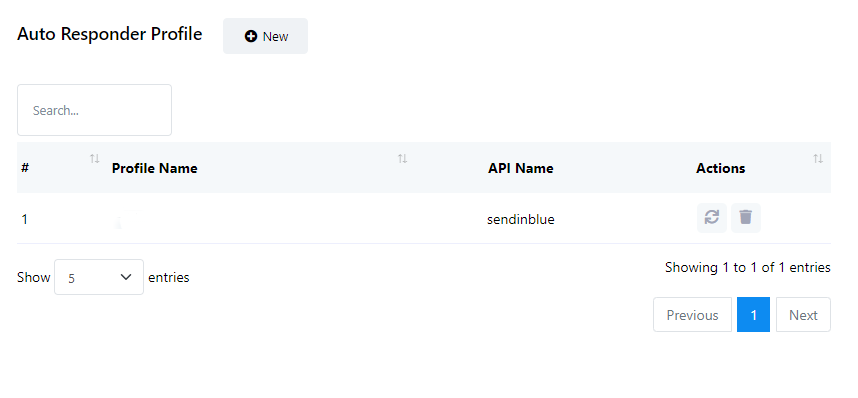
Under the `Auto Responder` section, you will encounter several fields, including:
- Mailchimp List
- Sendinblue List
- Activecampaign List
- Mautic List
- Acelle List
To configure these fields, follow these steps:
In the `Integration` section, if you`ve already created auto responder profiles for different providers, you can choose the appropriate auto responder account.
Once you`ve selected the auto responder account, any email addresses collected through the bot will be automatically included in the corresponding account.
Within this section, you`ll find various fields for configuring specific lists, including `Mailchimp List`, `Sendinblue List`, `Activecampaign List`, `Mautic List`, and `Acelle List`. These fields allow you to define where the collected email addresses should be stored based on your chosen auto responder service.
Configuring Auto Responder Integration
When users interact with the bot and provide their email addresses, there`s no need for manual transfers or exports. The collected email addresses will be seamlessly integrated into the selected auto responder service you`ve configured.
To set up auto responder integration, follow these steps:
Fill out the necessary fields with the relevant information. This typically involves specifying the specific lists or accounts within your chosen email marketing or auto responder platforms that you wish to connect to.
If You Haven`t Created an Auto Responder Profile in the Integration Section:
Click the `New` button located next to `Auto Responder`.
Next, click the `New` button next to `Auto Responder Profile`.
Select the auto responder service you want to use.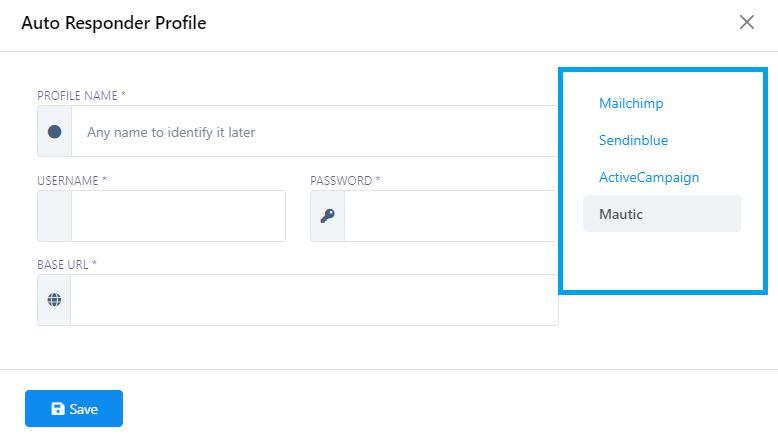
Complete the required input fields.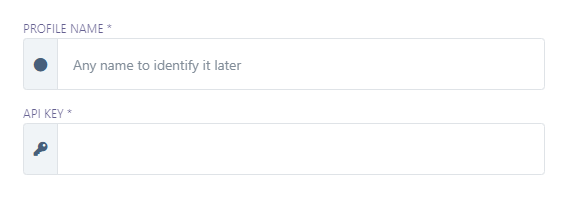
Click `Save` to create your user profile.