
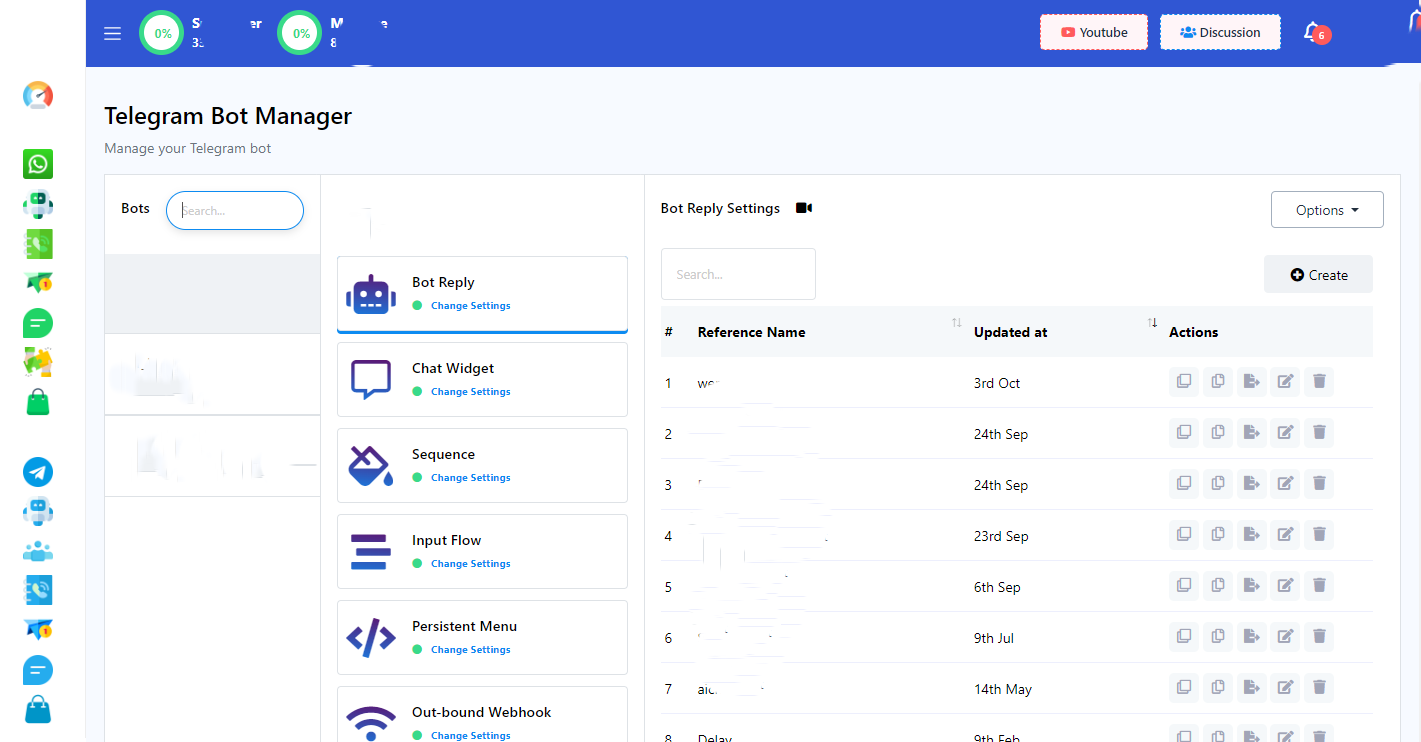
Access the Bot Manager from the dashboard’s left side menu and head to the `Bot Reply` option, there you`ll find a `Create` button located in the upper right-hand corner. To initiate the process of constructing a bot, select the bot account if you have multiple bots connected and then simply click on the `Create` button while ensuring that the `Bot Reply` option is selected.
Visual Flow Builder Editor
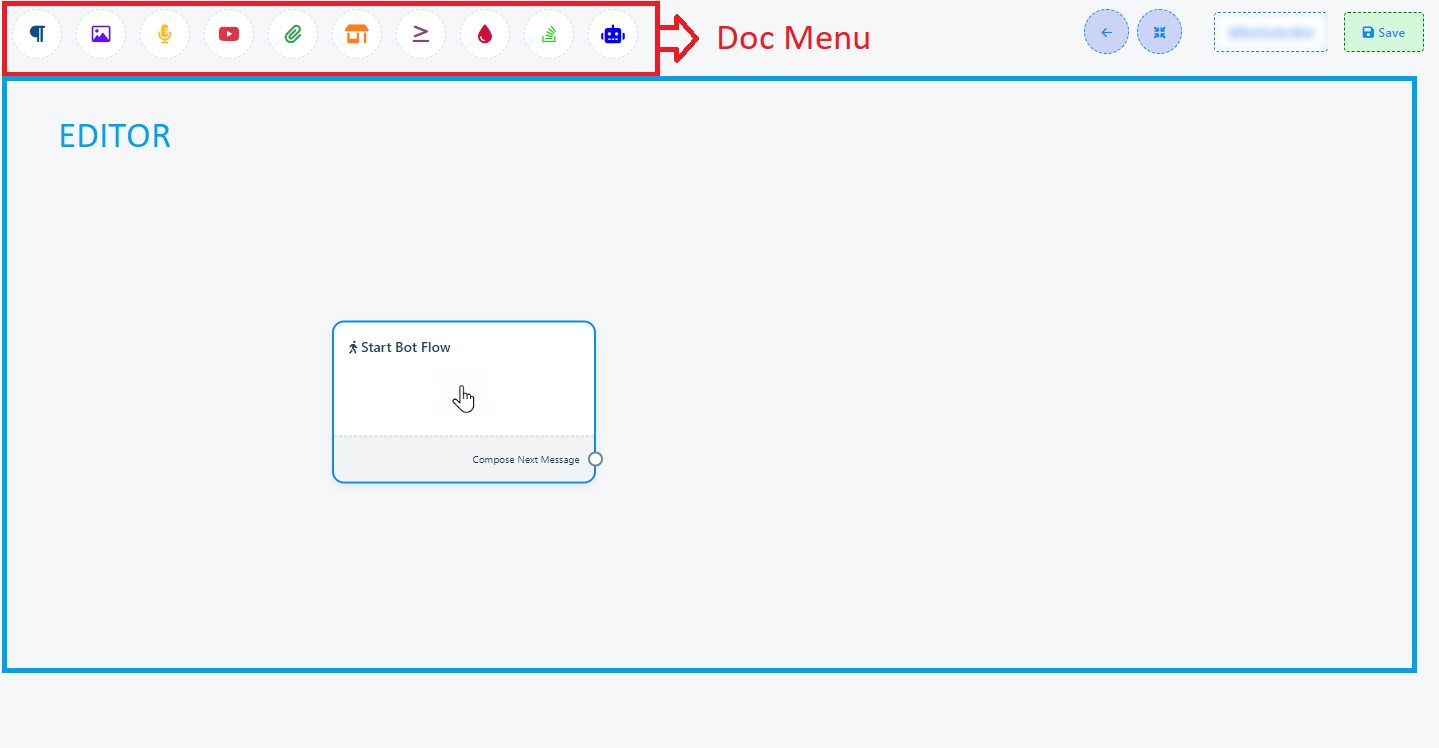
Subsequently, the Visual Flow Builder editor will become accessible, featuring two distinct sections: the `Top menu` and the `Editor`.
Once you`ve open the Flow Builder, you`ll find that all the components are conveniently consolidated at the upper-left corner of your screen in the `Top menu`. Simultaneously, within the `Editor` section, you`ll notice that the `Start Bot Flow` component is already preloaded for your convenience.
To construct a bot, follow these steps:
- Drag and Drop Components: Begin by dragging components from the `Top menu` and dropping them into the `Editor` section.
There are two other ways to add a new component in you bot flow:
- You can drag from the socket and find a list to add new a component. (Add components without dragging from Top-menu)
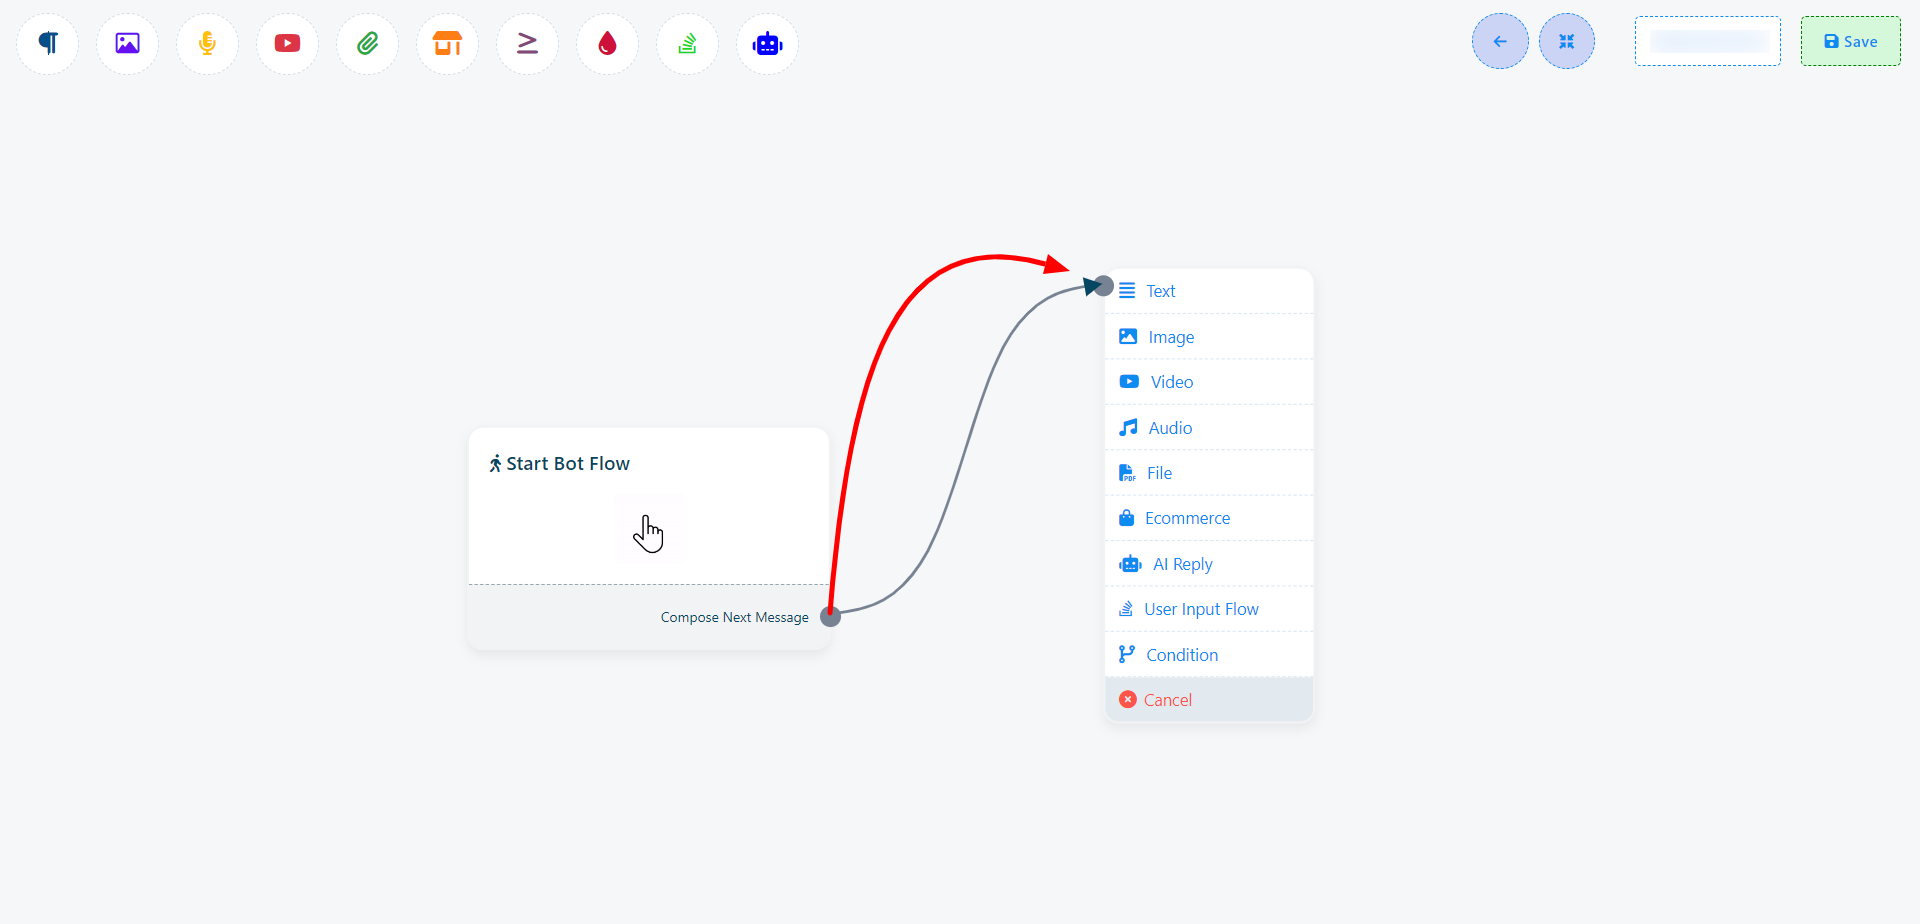
You can also add components without dragging the component from the Top-menu and dropping it on the editor. From the sockets of any component, drag the cursor and drop it on the editor.
Adding components to your chatbot is flexible and doesn`t always require dragging from the Top-menu to the editor. You can also do it directly from the sockets of any component. Here`s how:
Drag and Drop from Sockets: From the sockets of any component, simply drag the cursor and drop it onto the editor.
Component Selection: In most cases, this action will instantly display a menu containing various components and a cancel button. From this menu, you can select a component, and it will appear in the editor, automatically connected to the parent component.
Cancel Option: If you decide not to select a component and want to dismiss the drop-down menu, click on the Cancel Button
For instance, let`s say you drag from the next output socket of the text component. This will trigger a drop-down menu showcasing different components such as Text, Image, Video, Audio, File, Ecommerce, User Input Flow, and a Cancel button. From this drop-down menu, you can choose your desired component. If you wish to cancel and not add a component, simply click on the Cancel button.
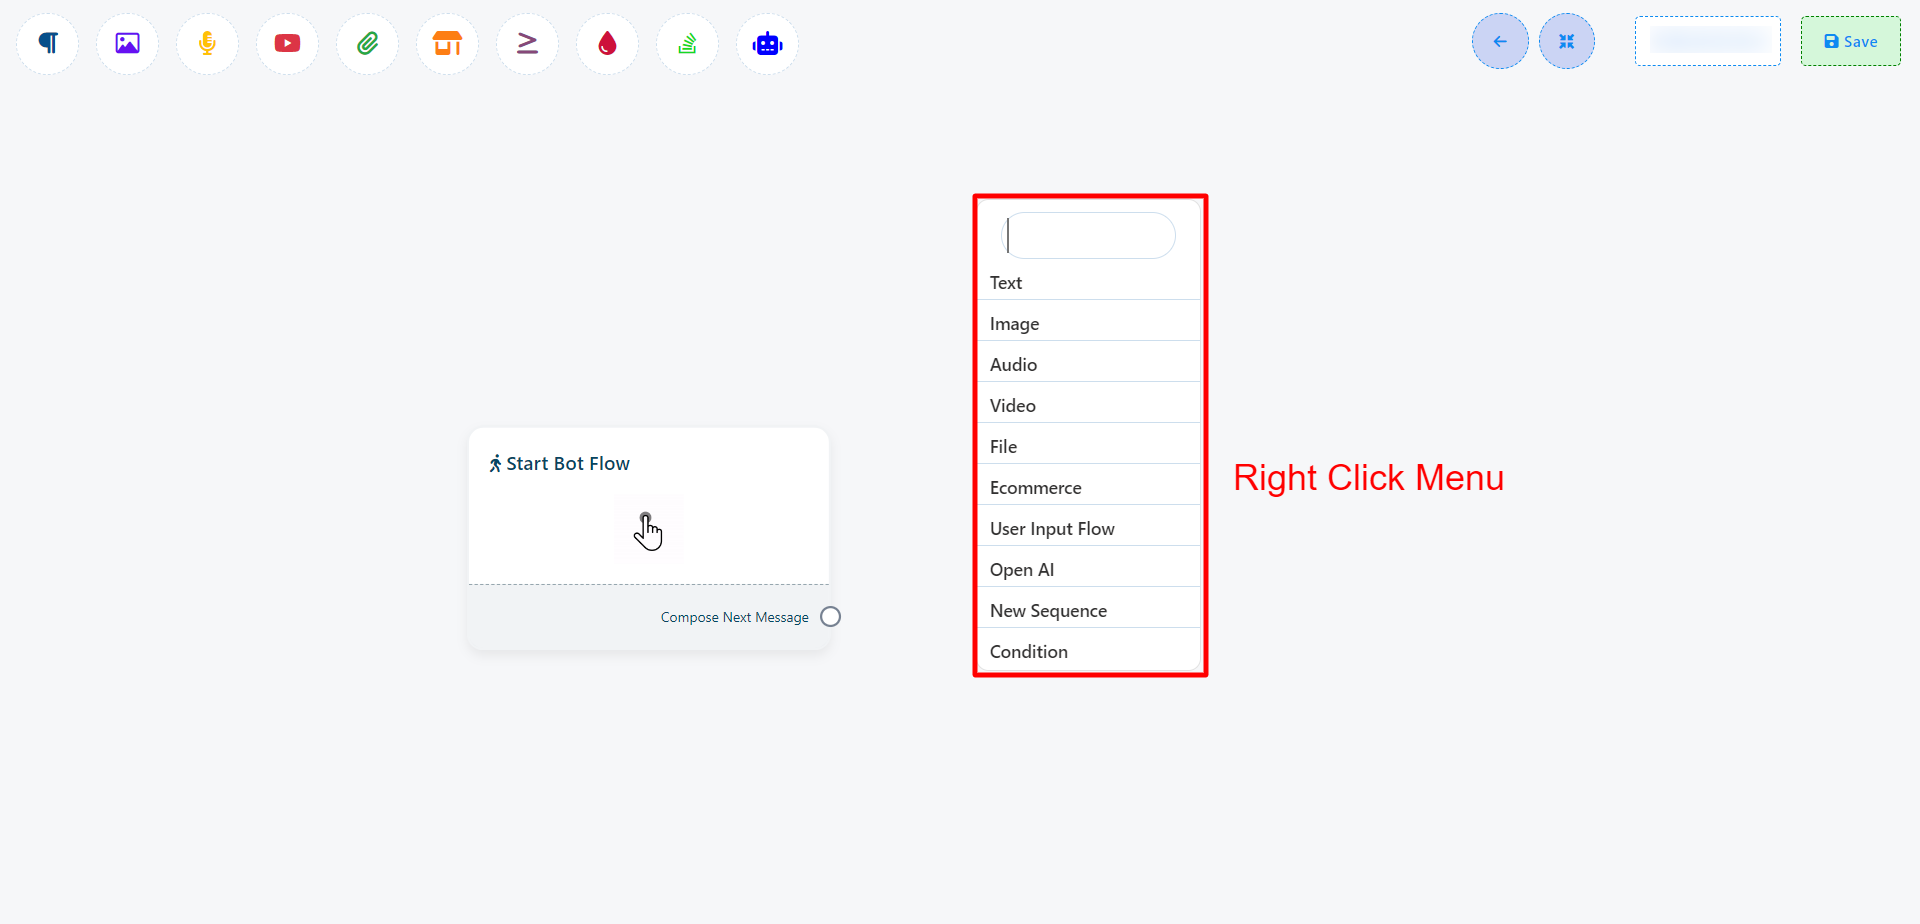
- You can right click on to the editor and you will find a list of components and you can select a component from there.
- Configuration: Configure these components according to your requirements.
- Connect Components: Establish connections between the components to create a functional flow.
Start bot flow
Within the `Editor` section, you’ll еncountеr a crucial еlеmеnt known as the `Start Bot Flow` This component serves as the foundation for building your bot. Out of the ten fields, `Keyword Triggering`, `Matching Type`, and `Title` are mandatory to fill. You can use other fields if you need them.
To configure this еlеmеnt, you must know:
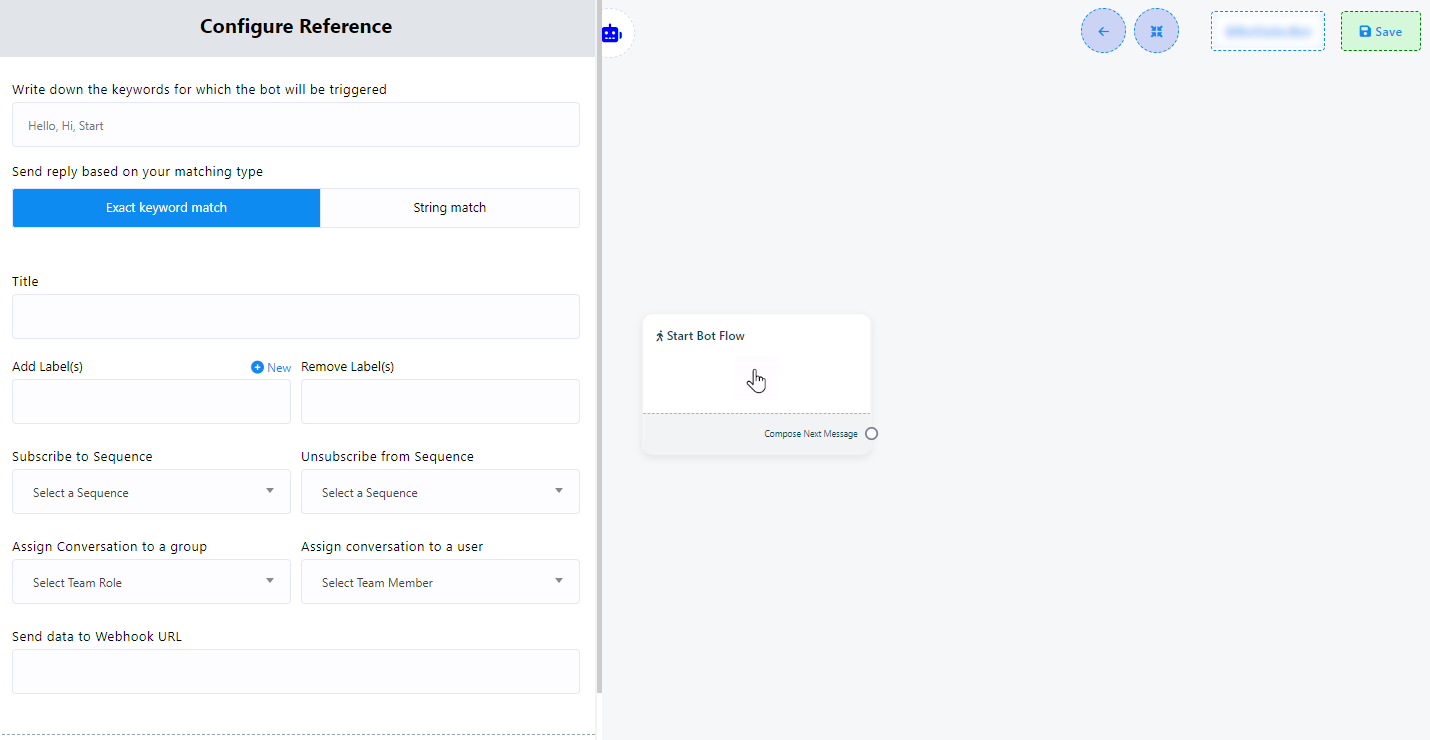
- Keyword Triggering: To initiate the bot using specific keywords, double-click on the `Start Bot Flow` element. This action will open the `Configure Reference` left sidebar, featuring ten fields and two buttons. In the keyword field, add keywords and separate them with commas when you add more than one keyword. When a user enters text in the messaging window that matches any of these keywords, the bot will be activated

- Matching Type: You can choose the matching type by clicking on one of the two buttons provided: `Exact Keyboard Match` or `String Match`. By default, `Exact Keyboard Match` is selected. With this option, the bot will start only if the user`s input matches the keyword exactly. In contrast, with `String Match`, the bot will trigger if the user`s input partially matches the keyword.

- Title: Assign a title to your bot in the `Title` field. This title is simply a name for your bot.

- Add Labels: Utilize labels to categorize your audience into different segments, such as demographics, interests, or purchase history. This enables targeted messaging and campaigns tailored to each group, improving engagement and conversions. (You can create a new label by clicking `+ New` if needed).
- Remove Labels: If needed, you can remove labels from users by using this field.

- Subscribe to Sequence: Sequences enable you to send a series of automated messages to your chatbot subscribers over time. This can be useful for onboarding new subscribers, nurturing leads, promoting products, or re-engaging inactive subscribers.(you will find more information about this on sequence section in this documentation)

- Unsubscribe from Sequence: This field allows you to unsubscribe a user from any sequence.
- Assign Conversation to a Group: Assign conversations to specific groups within your organization. For example, you can assign a conversation to your executive group, allowing any member of that group to handle it.

- Assign Conversation to a User: Assign conversations to individual team members. For instance, you can assign a conversation to your manager, designating them as the responsible party.
- Send Data to Webhook URL: Add your webhook link to send bot data to a specified URL. This facilitates easy data storage via webhook integration.
