
Add a Telegram Chat Widget to Your Website with XpressBot
Integrating a Telegram Chat Widget using XpressBot lets your website visitors connect with you instantly through one of the most trusted messaging platforms. With XpressBot, setup is simple and fully customizable from setting your brand colors and welcome messages to selecting the widget’s placement and size.
This guide walks you through how to create, configure, and embed the Telegram Chat Widget with XpressBot, helping you build faster and stronger communication with your audience.
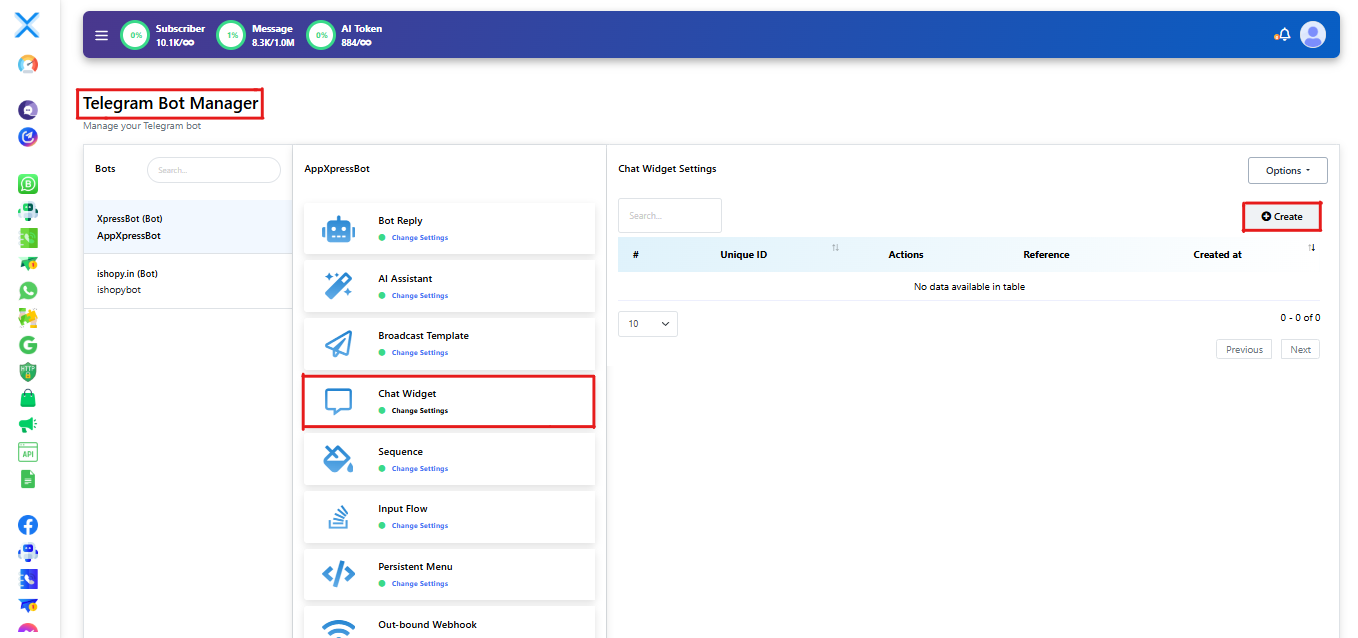
Step 1: Access the XpressBot Dashboard & Create Your Telegram Chat Widget
- Log in to your XpressBot account.
- Navigate to Telegram > Bot Manager in the sidebar.
- Select your preferred Telegram bot from the list.
- Click on Chat Widget.
- Hit the Create button at the top-right corner to start customizing.
Step 2: Configure Your Telegram Chat Widget in XpressBot
Once you’ve created your widget, it’s time to customize it to match your brand and engagement goals. Follow these steps in the Configure Action Button panel within the XpressBot dashboard:
- Choose Action Type
Select thet.meshort link from the dropdown under Actions to direct users to your Telegram bot. - Upload Chatbot Logo
Add a logo for your bot (supports.pngand.jpgformats) to personalize your chat interface. - Design the Chatbox
- Set your Chatbox Header Background Color and Text Color to align with your brand style.
- Input a Display Name, a friendly Welcome Message, and a Pre-fill Message to guide user interaction.
- Set Widget Placement
Choose where the chat widget appears on your website, such as the bottom-right corner. - Auto Open Option
Decide if the Chatbox should automatically open when a page loads. This helps draw immediate attention if enabled. - Adjust Widget Offsets
Use X and Y offset values to fine-tune the widget’s position relative to screen edges. - Customize the Action Button
- Edit the Button Text shown after successful opt-in.
- Set Button Colors for background, text, and hover effects.
- Choose the Button Size that fits your layout best.
- Add Reference Tag
Enter a unique Reference name for internal tracking. This helps you identify and manage the widget later within XpressBot.

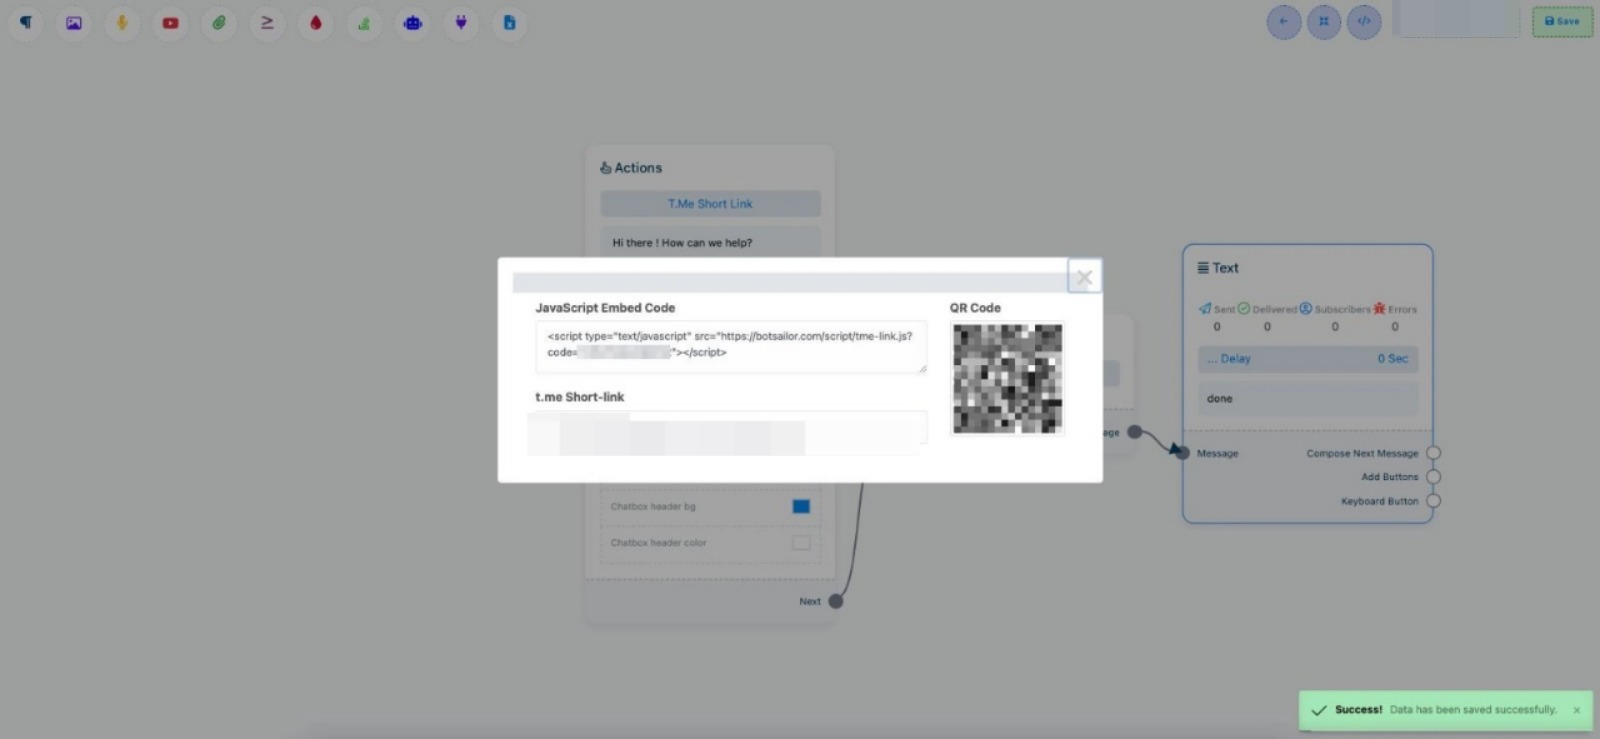
Step 3: Save and Embed Your XpressBot Telegram Chat Widget
Once you’re satisfied with your configuration:
- Click the
Savebutton to finalize and store your customized widget settings. - To add the widget to your website, click the
Embed Code (</>)icon.
This will generate the code snippet you need to place in your website’s HTML—usually before the closing</body>tag.
Step 4: Embed the Widget on Your Website
Copy the generated JavaScript code and paste it into your website’s HTML — ideally just before the closing </body> tag. This will activate the XpressBot Telegram Chat Widget on your site.
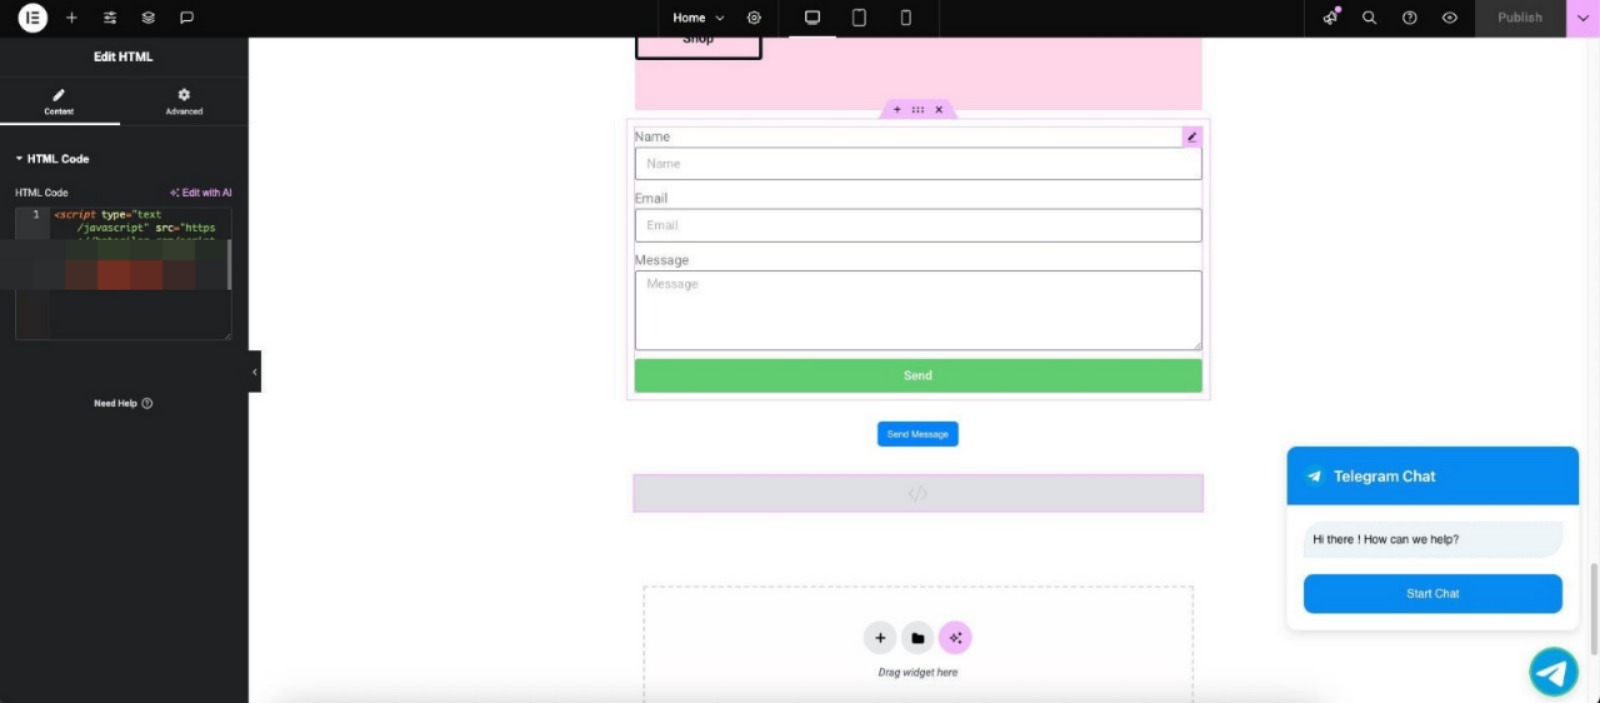
Step 5: Publish and Go Live
After publishing your changes, the XpressBot Telegram Chat Widget will appear on your website exactly where you placed it. Visitors will now be able to connect with you instantly through Telegram, boosting real-time engagement and support.
Conclusion
Integrating the Telegram Chat Widget with your website using XpressBot is a simple yet powerful way to improve customer interaction and real-time support. From customizing your chatbot’s appearance to embedding it with just a few clicks, XpressBot offers a flexible, user-friendly solution that aligns perfectly with your brand.
Whether you’re aiming to boost engagement, speed up response times, or offer a more modern support channel, XpressBot helps you connect with your audience instantly right where they are.